INTRODUCTION
I got into airsoft almost exactly one year ago. While I suck pretty handily at playing, I seem to have a better aptitude for the tech aspect of things.
I wanted to put together everything that I've learned in the last year into a single project. I had picked up a broken TM G36C off of Craigslist a while back. It was in pieces, but the owner claimed it was all there plus some extras. And at $80, the price was right and satisfied my Japanese predilection.
I'm a few months along on the project and have been taking pictures throughout. I wont lie and pretend like everything worked out perfectly as I've already made some mistakes, but that's how we have to learn sometimes.
I've learned the vast majority of tech knowledge from http://forums.airsoftmechanics.com/. I suggest this site highly.
Nothing I'm attempting in this build is revolutionary, instead it's an attempt at replicating what has been verified to work best. My goals are fairly moderate compared to what is possible. From the onset, I was looking for mid 300s for FPS, and mid 30s for rounds per second keeping with a CQB mindset as a foil to my DMR AUG, while being significantly less expensive than my DMR build. I also wanted to restore the appearance of the gun as it was in pretty poor shape as it had been sitting in a box in his garage for a few years, and had a few years worth of use before that.
START
Right after I first bought it, I gave it a good cleaning and test fit everything together and I placed it next to the rest of my collection.
http://i16.photobucket.com/albums/b46/s ... /Start.jpg
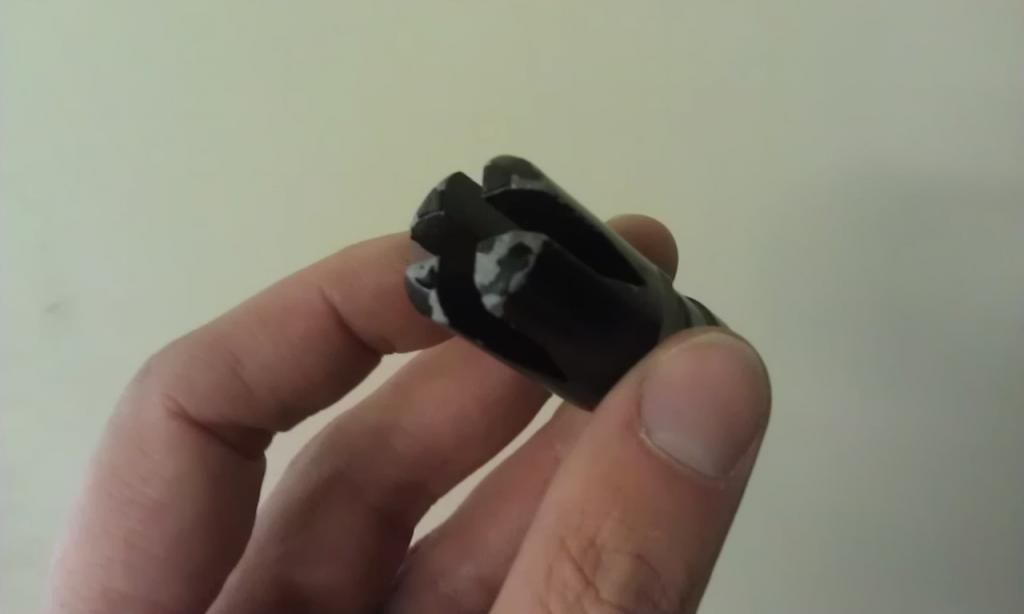
The front inner barrel assembly had been cut up quite a bit to make room for an extra large battery, a ni-cd. I would not be using this dinosaur. One of the nice extras was a Laylax extended hand guard. One of the not-so-nice extras was the front of the inner barrel assembly, where the flash hider screws on to, had snapped off. This was fixed with epoxy and a zip tie. Crude, but effective.
After media blasting the metal exterior bits and repainting them black, and opening the gearbox for an inspection, regrease, and a proper shimming, I took it out to a game and let a friend use it. It held up well, firing a healthy 365 fps with the only internal mod being an M100 spring installed by the previous owner. The large metal piston head spacer was still inside the piston and compressed the spring to a higher output (normally an M100 should shoot around 330fps). Rate of fire however, was a very sad 9 rps with a 8.4v ni-mh.
Also, my rattlecan paintjob was destroyed after only a single game. The rest of the metal components fared as well as the flash hider.
http://i16.photobucket.com/albums/b46/s ... dPaint.jpg
Obviously, it needed to be redone properly.
BODY
I decided on a camo paint job and collected some images that served as inspiration.
http://s16.beta.photobucket.com/user/sp ... nspiration
I didn't want to just spray the whole thing, as that looks a little cheap to me. I disassembled the entire replica and went back to the media blasting cabinet to take all the crap black paint from the metal bits and give a little texture to the plastic body.
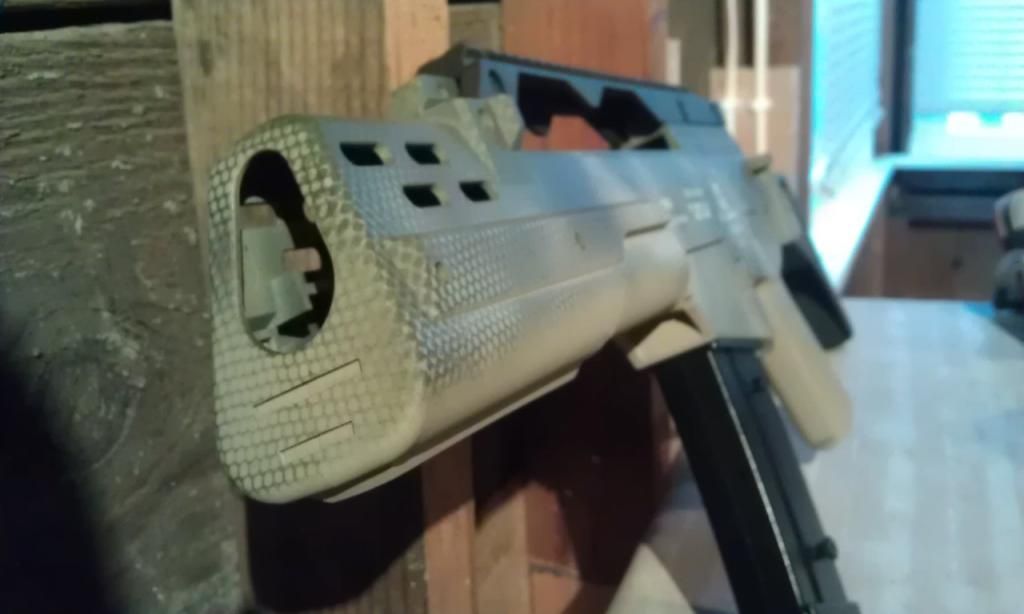
After my fiance told me I couldn't cut up her laundry bag to use the mesh netting for that 'snakeskin' look that I wanted, I did the next best thing and cut up an old dishrag that had a nice mesh backing to it. I used Krylon Fusion camo ultraflat paint as I had heard good things about it adhering to plastic.
After cleaning all the plastic pieces in alcohol and allowing them to dry, I painted each piece separately with a base coat of tan. I let that dry for a few days (while it may be dry to the touch quickly, it can take weeks for the paint to dry completely). I then assembled the body together with the exception of the stock and top rail as I wanted those, and the hardware, to stay black.
I placed the washcloth mesh over a small section of the body at a time and randomly applied dark green and dark brown streaks and spots. I sprayed from the top down as I wanted the lower parts to be lighter, emulating the underbelly of a reptile. After letting that dry for a few hours, I was unsatisfied with how tan it still looked, so without the mesh I sprayed more dark green and brown, then letting that dry I placed the mesh back over and did a few light touches of tan. The results of this made me happy.
http://i16.photobucket.com/albums/b46/s ... tClose.jpg
http://i16.photobucket.com/albums/b46/s ... intFit.jpg
Letting this dry for a few weeks touching it as little as possible and it left a nice durable finish that should not chip. To date I haven't taken it to a game, but I'm anticipate some scratching, which is fine as it should break up the outline even more.
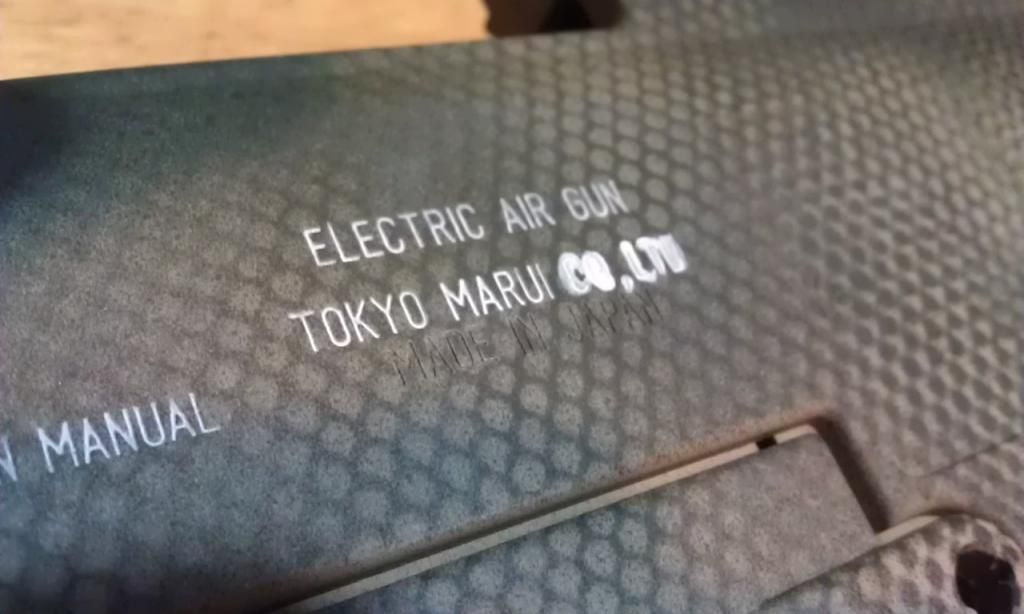
You may have noticed the white trades on the left side. This is actually quite simple to do. Because this is a US market gun, the "HK" and "G" and "C" were scraped/burned off before importing. However, the media blasting had revealed that the original casting impressions were still there, showing me a faint outline. Before I painted it, I took a sculpting tool I had laying around and carefully restored the trades, not perfectly, but good enough.
I used a cheap acrylic white paint and a small paintbrush. Don't be sloppy, but paint as close to the lines of the trades as possible, like this:
http://i16.photobucket.com/albums/b46/s ... dies-2.jpg
And with a damp cloth, lightly wipe away the excess paint. Work in small sections and wipe away the excess before it dries. Voilà:
http://i16.photobucket.com/albums/b46/s ... ades-3.jpg
For the metal bits, I researched various coatings, but it seems the zinc-alloy that TM uses for their castings is pretty difficult to apply a coating to without special equipment. So I decided to go with an epoxy paint specifically designed for airplane propellers as I figured that would be as tough and cost effective as anything. http://www.skygeek.com/a150.html. I then put everything aside for a few weeks to fully cure and dry.
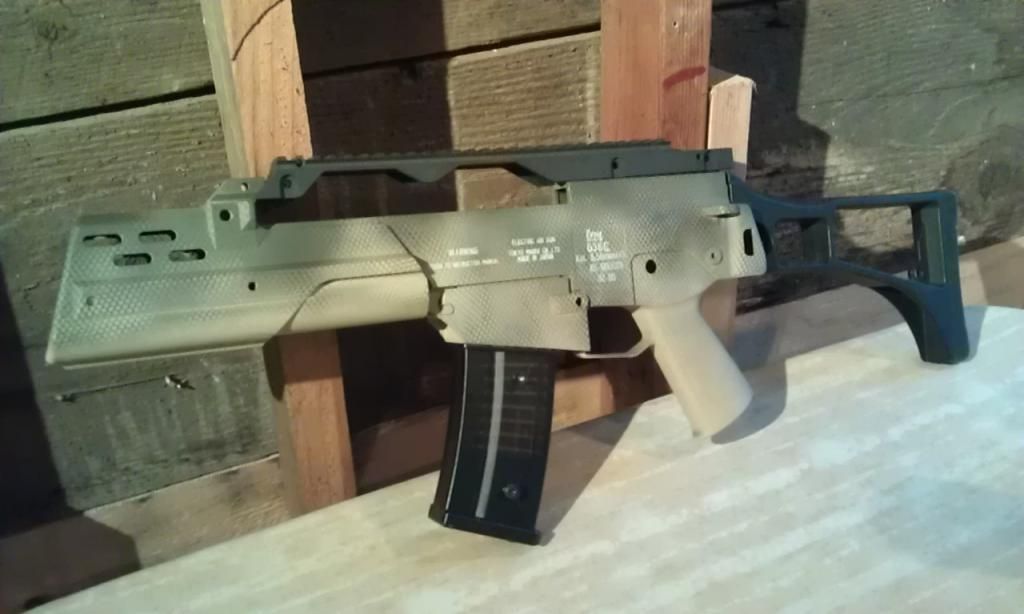
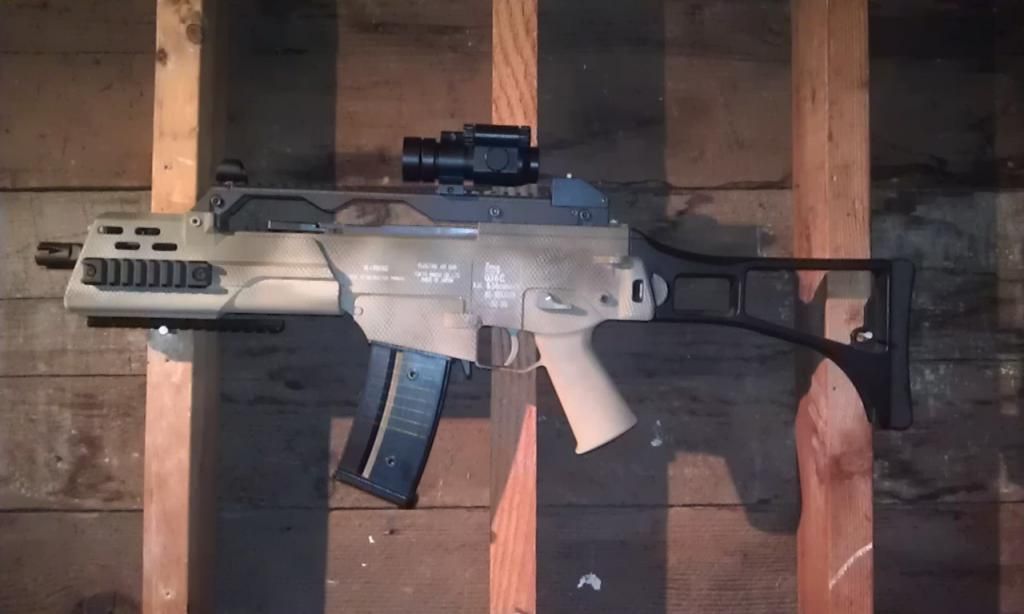
With the paint complete, I went to the local hardware store to replace the original nuts and bolts that were badly oxidized. Without the gearbox or hopup unit, I put the replica together for a test fit. Adding the TM Aimpoint replica red dot on top.
http://i16.photobucket.com/albums/b46/s ... nalFit.jpg
I think it looks pretty sexy.
WIRING/MOSFET
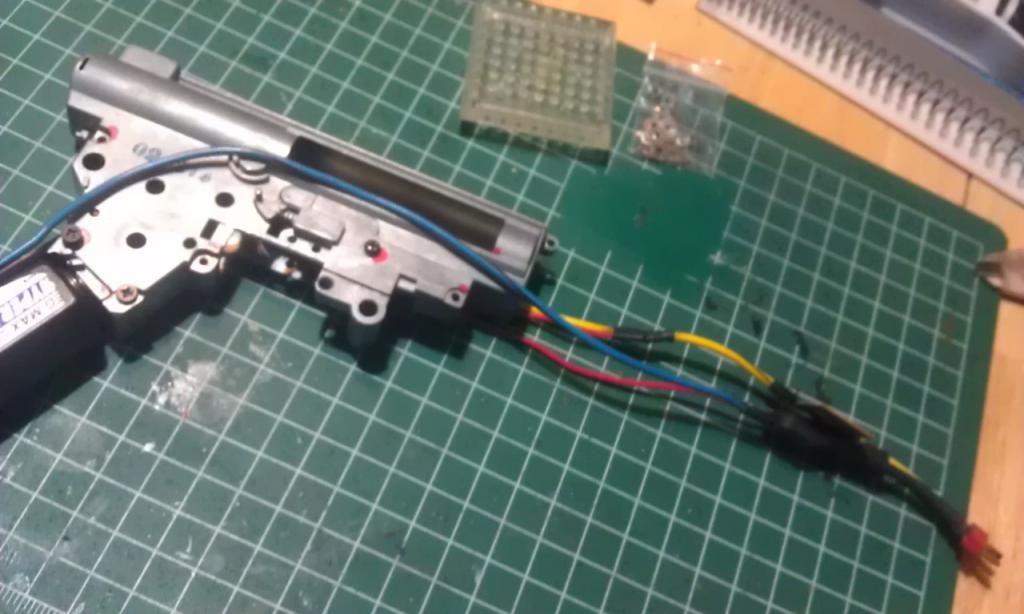
While I was waiting the paint to dry I started on the gearbox. Again, I was thinking of a CQB build, while still being viable outdoors. I wanted to maximize the rate of fire as inexpensively as possible.
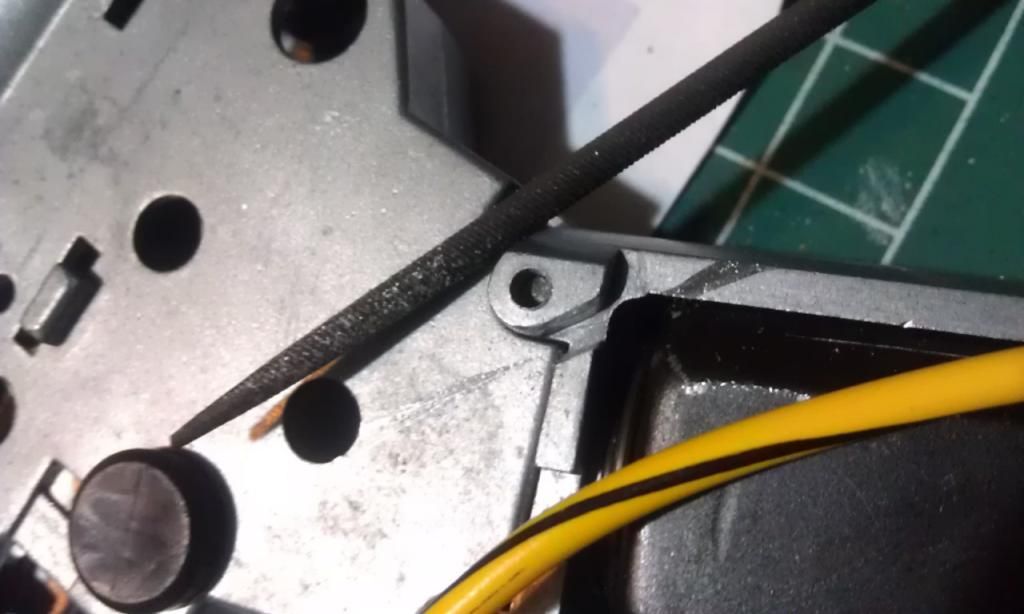
Seeing that the electrical was the biggest hindrance I sourced some 12ga automotive wire for free, which is totally overkill for this project and I would find out later was a bad idea. First, I had to file out the channels that held the original, tiny, TM wiring.
http://i16.photobucket.com/albums/b46/s ... AG0514.jpg
http://i16.photobucket.com/albums/b46/s ... AG0516.jpg
Turns out this was unnecessary as I could just run the wiring behind the channels.
Placing the gearbox shell and wiring into the grip proved difficult as the wiring is just slightly too fat. Ideally, I should redo this in teflon wire, 16ga would probably be fine for my power levels.
I also set about learning how to make my own mosfets and I bought enough components to make 3 units, for less than $20 total. They really aren't all that difficult if you have any experience with soldering electronics, but would take more technical explanation than I want to do here. There are lots of guides online if you want to make your own, again, AirsoftMechanics.com being an excellent source.
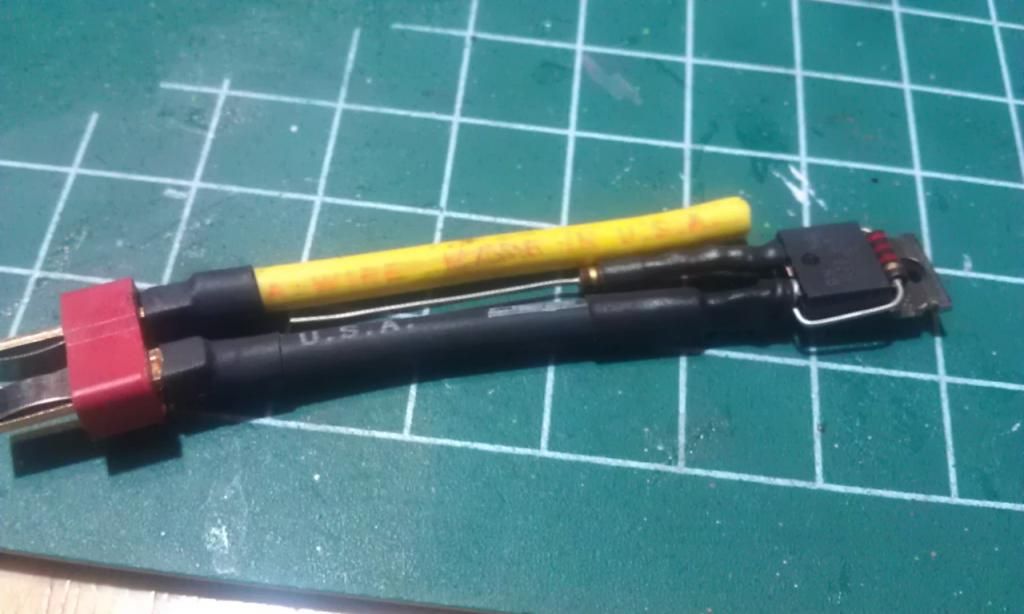
The mosfet assembly with Deans connector:
http://i16.photobucket.com/albums/b46/s ... AG0519.jpg
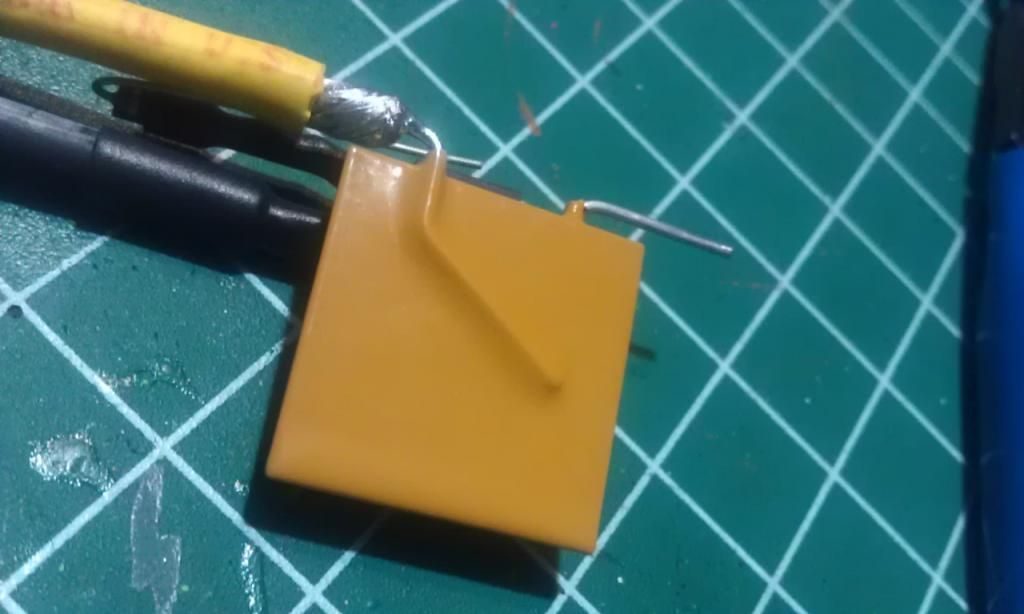
And a 20amp polyfuse:
http://i16.photobucket.com/albums/b46/s ... AG0520.jpg
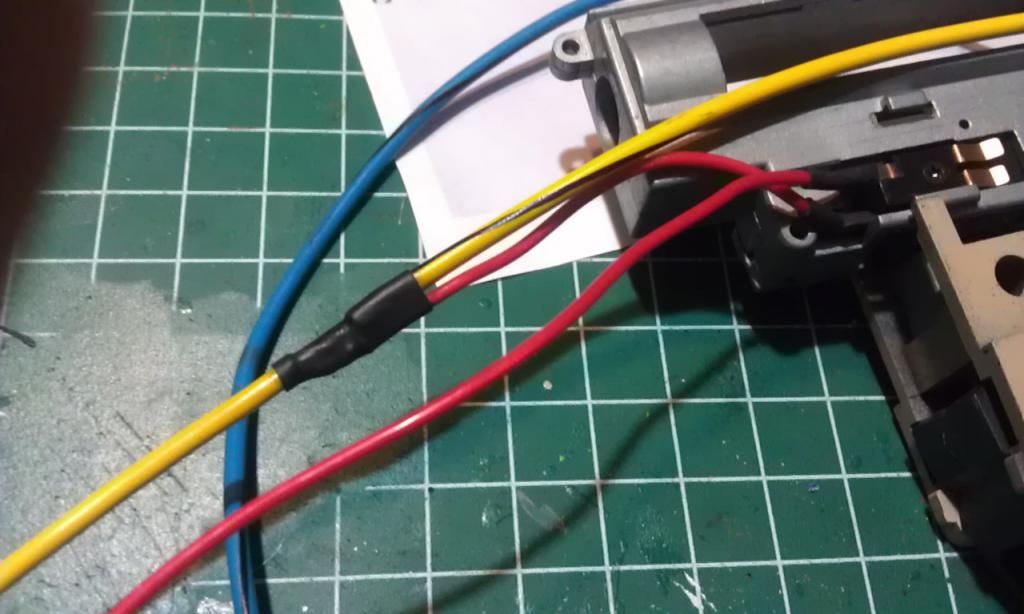
And plugged into the body to take my best guess at wiring lengths:
http://i16.photobucket.com/albums/b46/s ... AG0518.jpg
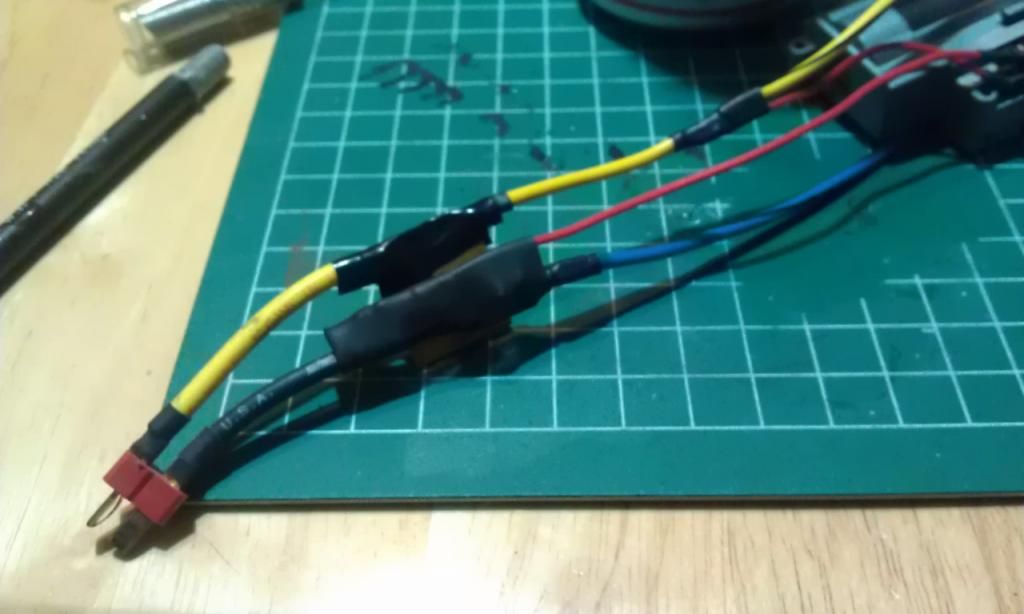
And the finished wiring:
http://i16.photobucket.com/albums/b46/s ... AG0517.jpg
http://i16.photobucket.com/albums/b46/s ... AG0522.jpg
http://i16.photobucket.com/albums/b46/s ... AG0535.jpg
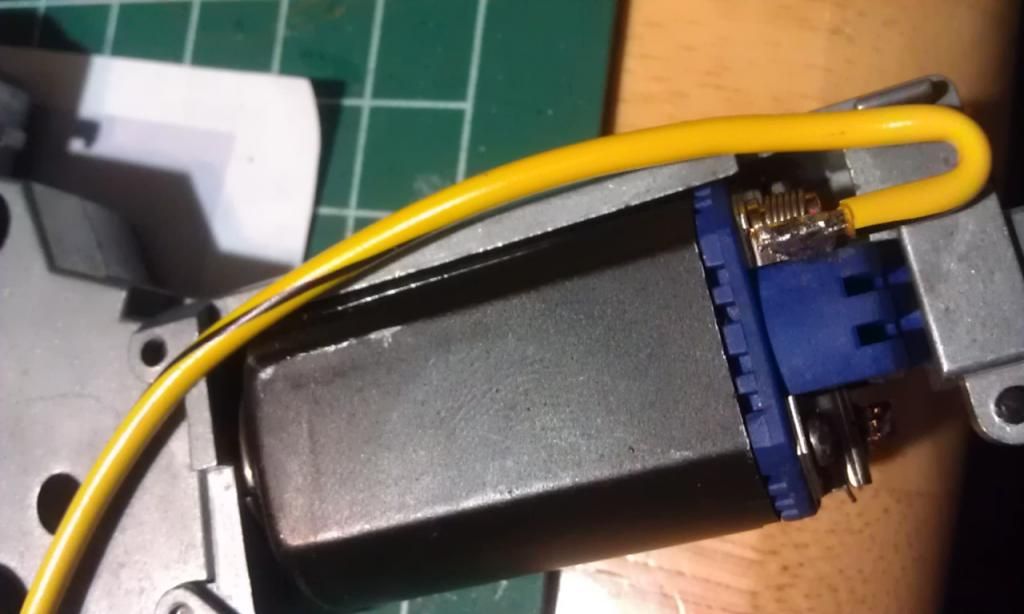
All of this was done to handle the output of the biggest battery I could fit. With a higher rate of fire I would need as large of capacity as possible. Measuring the interior dimensions of the Laylax extended hand guard, I ordered an 11.1v lipo battery with a 25-50c discharge and 2650mah capacity from Hobbyking.com. They have the dimensions and weight posted for each of their batteries so I knew it would fit beforehand.
Putting everything together I realized I had a problem. The battery easily fits in the hand guard but connecting the wiring and sliding the hand guard on to the body proved impossible, unless I connected it with the battery plug facing towards the back but that caused the wiring to fold in on itself and bend the weak polyfuse connection.
As I result, I've researched a more compact way of assembling the mosfet and will arrange the polyfuse so that it can be attached below it, forming one solid unit with the wiring facing towards the rear.
Another problem is that when the hop up and barrel are place in the gearbox, the wiring prevents it from seating properly. It works if I force it, but it's too crude for me to be satisfied with and threatens to bend the connections of the mosfet and polyfuse. Solutions to both problems to follow later.
TM G36C Resurrection Work Log (Completed)
3 posts
• Page 1 of 1
TM G36C Resurrection Work Log (Completed)
![]() by Spartanacus » Thu Nov 15, 2012 1:11 pm
by Spartanacus » Thu Nov 15, 2012 1:11 pm
Last edited by Spartanacus on Wed Nov 28, 2012 1:36 pm, edited 2 times in total.

-

Spartanacus - Grunt

- Team: N/A
- Posts: 95
- Age: 43
- Joined: Mon Nov 21, 2011 8:12 pm
- Location: Portland, OR
Re: TM G36C Resurrection Work Log
![]() by Spartanacus » Mon Nov 19, 2012 1:31 pm
by Spartanacus » Mon Nov 19, 2012 1:31 pm
GEARBOX
One tenet of a high speed build is to make the piston assembly lighter to avoid pre-engagement. That's when the sector gear is rotating faster than the piston return time, essentially catching it somewhere in the middle of the piston and forcing it back, and since you can't compress polycarbonate without bad things happening, bad things happen.
Basic physics tells us force=mass x acceleration (F=ma). The force is supplied by the spring and is virtually constant. But by reducing mass you can increase acceleration. Think about a Honda Civic vs. a Sport bike, both have about the same horsepower, but the bike weighs much less and therefore accelerates faster.
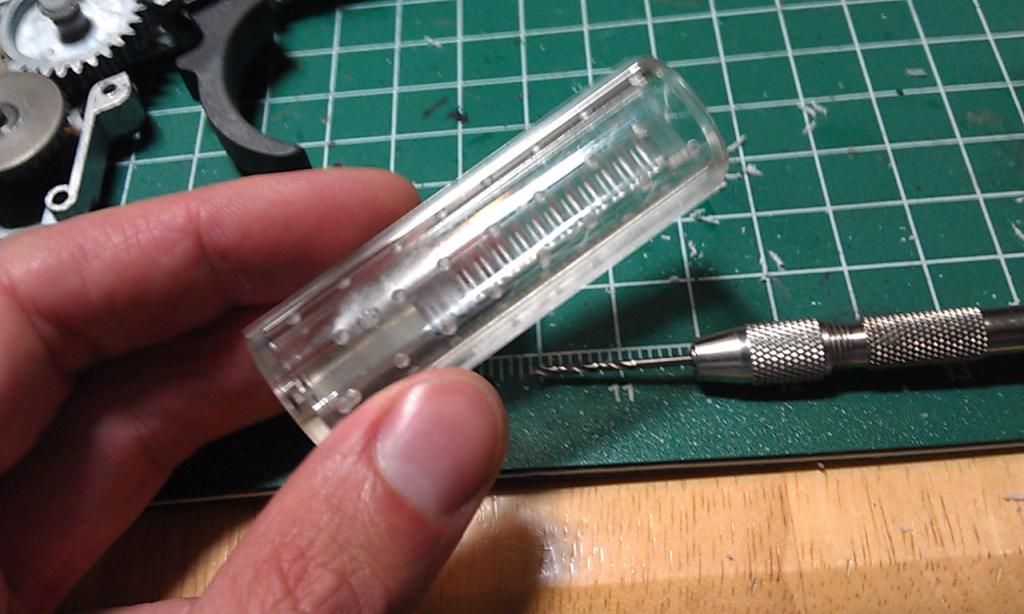
So I went about lightening the piston assembly to increase its return speed. The piston is an Angel polycarbonate with two metal teeth. It is lighter than the stock TM piston and was a good place to start from. I began drilling pilot divots with a pin vice. This minimizes the drill bit from wandering when I went to actually drill out the holes.
http://i16.photobucket.com/albums/b46/s ... ight-1.jpg
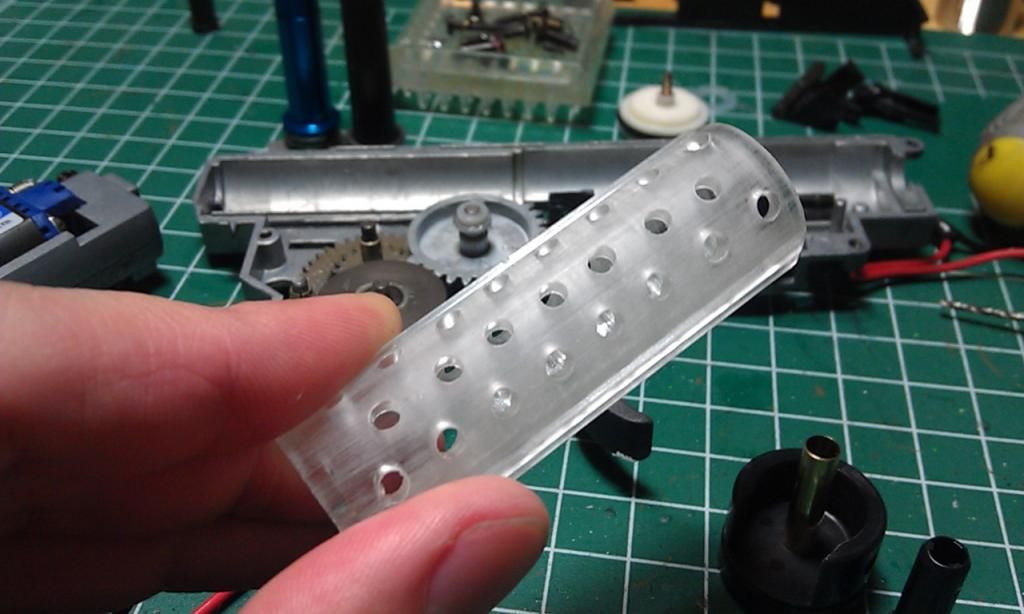
From there, I drilled through, slowly as not to punch through to the other side of the piston. After cleaning up the inside of all the little bits of polycarbonate that didn't come complete out of the holes, it looked like this:
http://i16.photobucket.com/albums/b46/s ... ight-2.jpg
This is pretty safe, retaining much of its strength, and I could probably safely go with bigger holes. But as I was only shooting for mid-30s for rpm while maintaining higher fps, this is enough. You can go much more aggressive than this, but keep in mind a lighter piston will be a weaker one.
I picked up a Hurricane Sig 552 upgrade kit from Airsoft Atlanta for $22, a smoking deal considering that it came with an M120 spring, steel bushings, bearing spring guide, POM bearing piston head, cylinder, cylinder head, and nozzle. Although the cylinder head and nozzle would not work for the G36, the rest of the parts were compatible with the TM version 3 gearbox. Overall, I would say the Hurricane parts are of acceptable quality while not great. The cylinder head being machined very poorly is an exception.
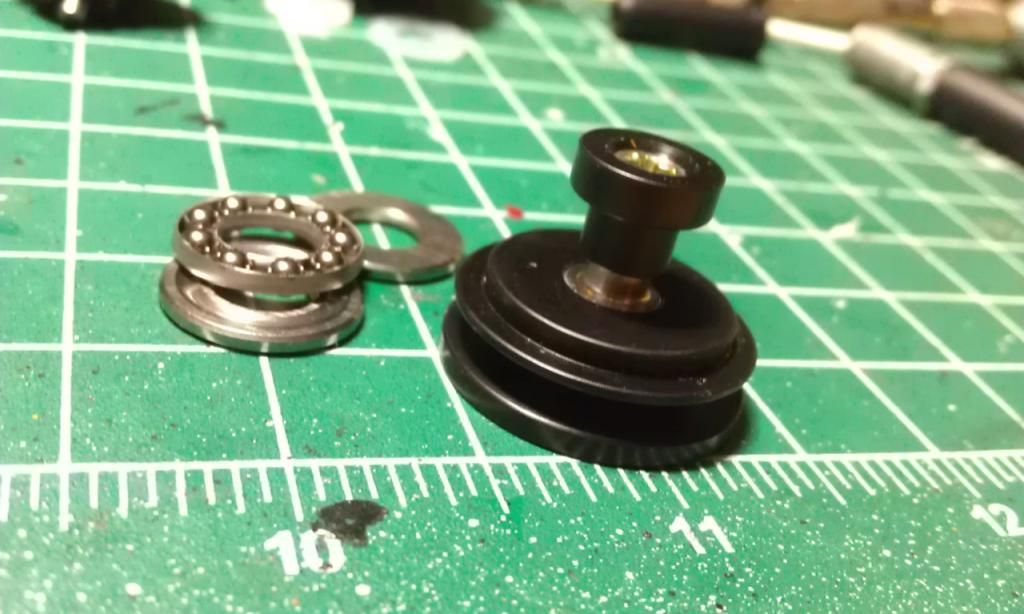
I removed the piston head bearings, again in the interest of saving weight and slightly reducing the output of the PDI 150% spring I was planning on using. With the bearings on the spring guide, they are redundant on the head.
http://i16.photobucket.com/albums/b46/s ... ight-3.jpg
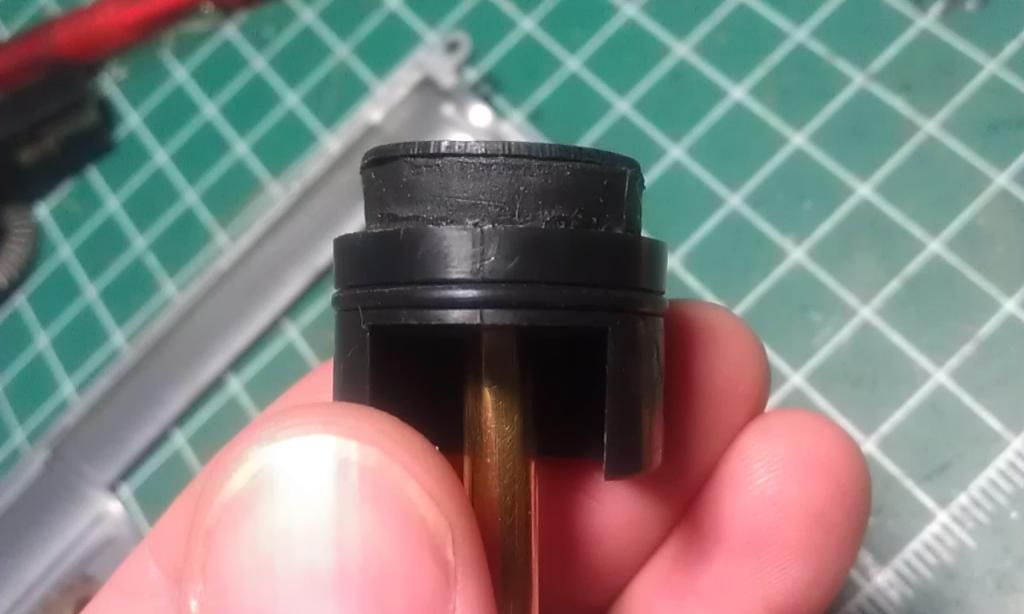
The Hurricane design has an aluminum nut that runs through the entire head, while not the lightest piston head available, this looks very strong and with my build, acceptable.
http://i16.photobucket.com/albums/b46/s ... ight-4.jpg
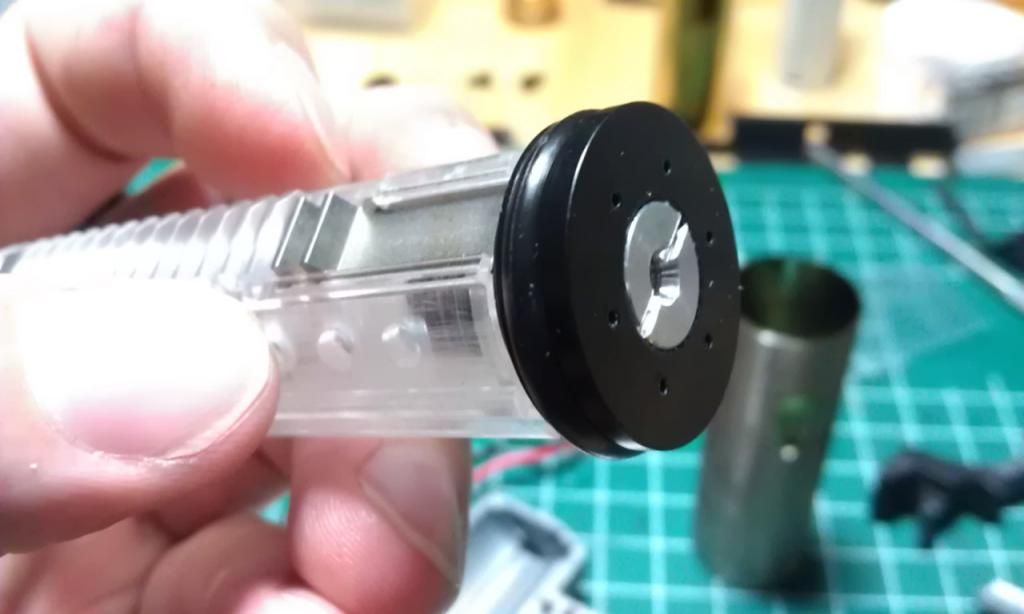
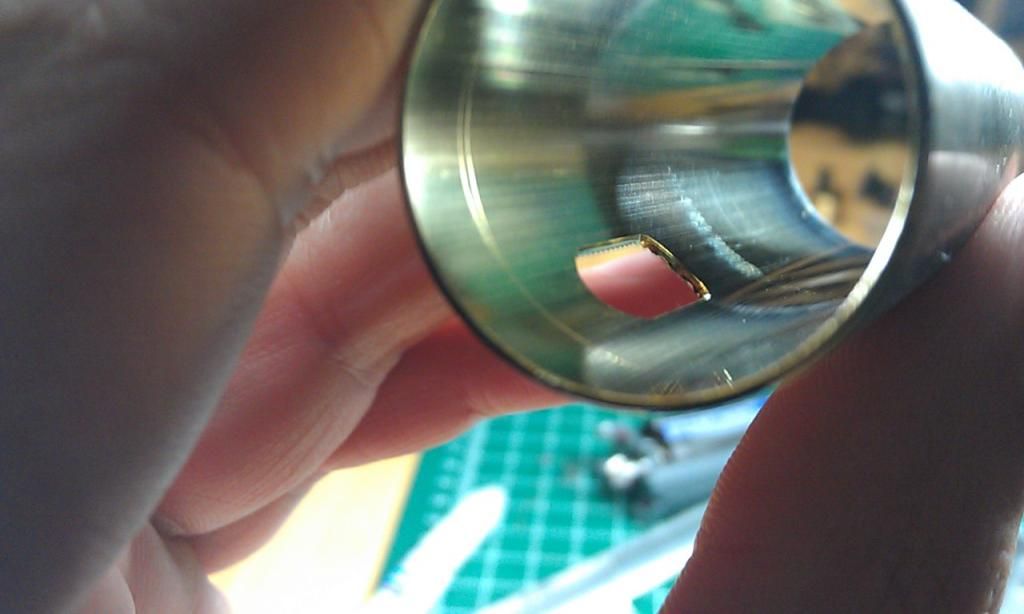
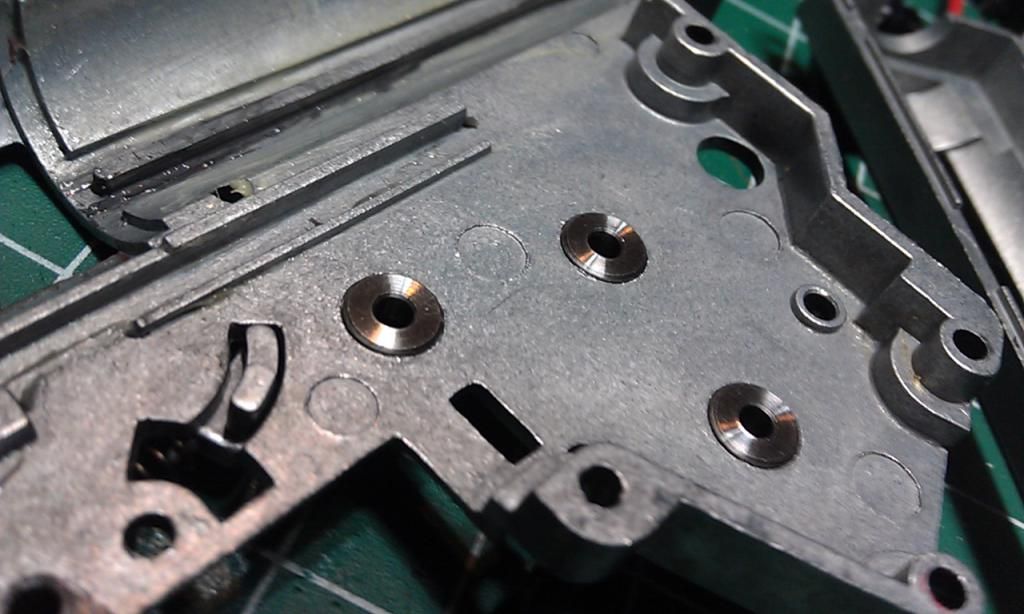
With the piston assembly done, I moved on to the compression parts. The original cylinder looked fairly good, although the interior was not as polished as the stock TM cylinder. I took an Exacto blade and edged the inside of the port and followed it with a fine grit nail file to remove an small burs that might have been left by the manufacturing process and would damage the o-ring over time. You can barely see the shiny copper colored edge around the inside of the port.
http://i16.photobucket.com/albums/b46/s ... rDebur.jpg
Together, the original cylinder head and nozzle were fairly worn and had poor compression. This can be tested by holding the nozzle halfway on the cylinder head shaft (::tee hee::, but seriously, this is about where the nozzle is when the piston slams the air out of the cylinder) cover the back of the cylinder head with your figure and blow on the nozzle as hard as you can. If your face gets all red, you have good compression, but if you can slowly force air out, then your compression is poor.
The stock TM nozzle does not have an o-ring and years of use had worn it down. I would later order a Lonex nozzle from Clandestine Airsoft, also a good deal at $6, and has an o-ring, and would restore the compression between the two parts.
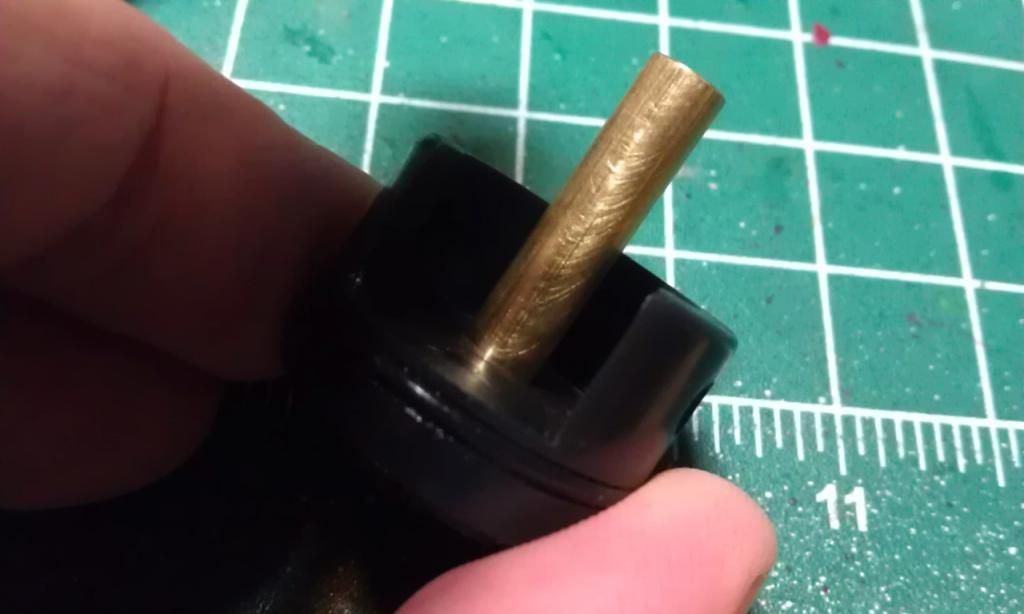
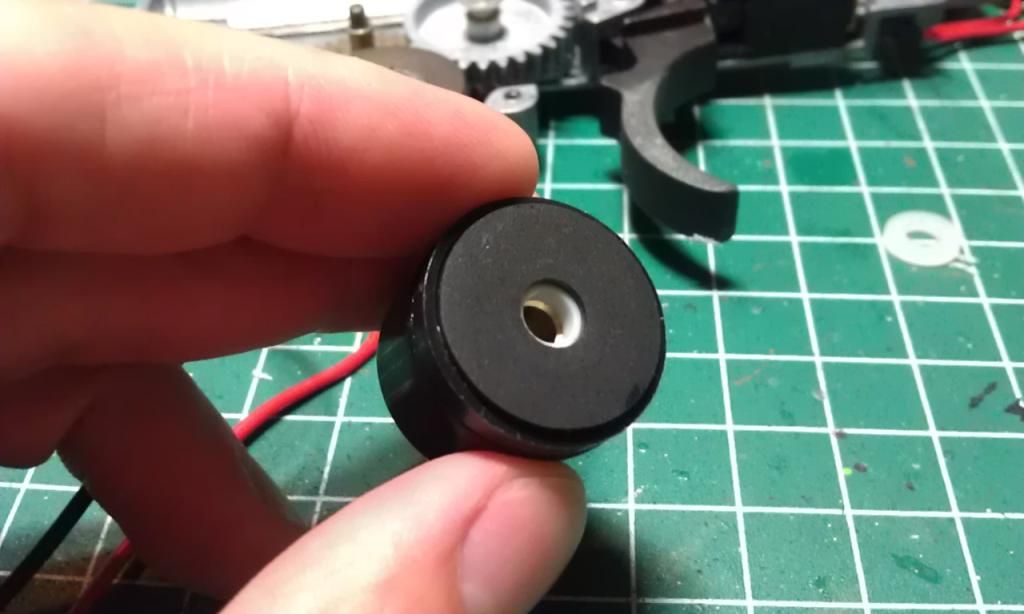
Since the stock cylinder head was fine aside from the shaft being scratched, I decided to polish it and call it good. Any metal polish, like Brasso, will work fine.
Before:
http://i16.photobucket.com/albums/b46/s ... Head-3.jpg
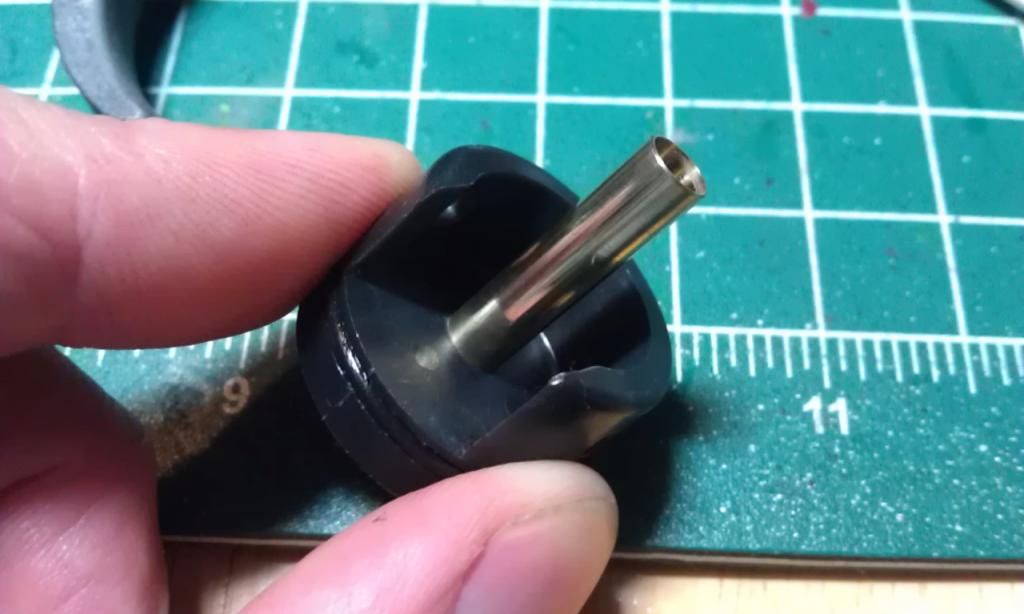
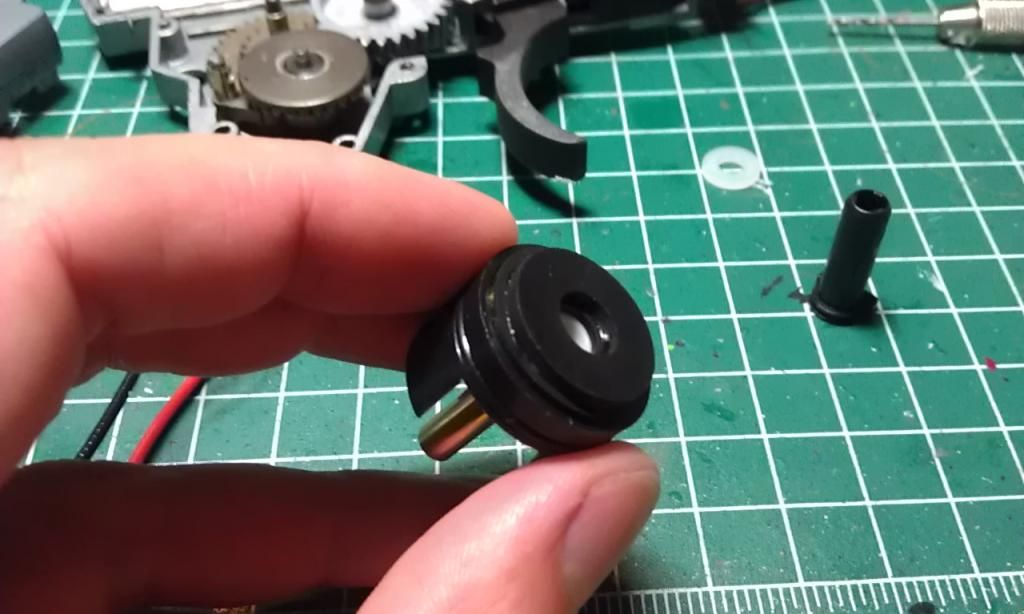
And After:
http://i16.photobucket.com/albums/b46/s ... Head-4.jpg
Next on the cylinder head was to add an extra rubber washer, available at Home Depot or whatever very cheaply, in order to correct the AOE, or angle of engagement. I'll discuss AOE later.
Clean the rubber pad on the cylinder head and the rubber washer with alcohol (head-1) and then superglue them together (head-2). A little is enough and this will hold very, very well, as I would later find out.
http://i16.photobucket.com/albums/b46/s ... Head-1.jpg
http://i16.photobucket.com/albums/b46/s ... Head-2.jpg
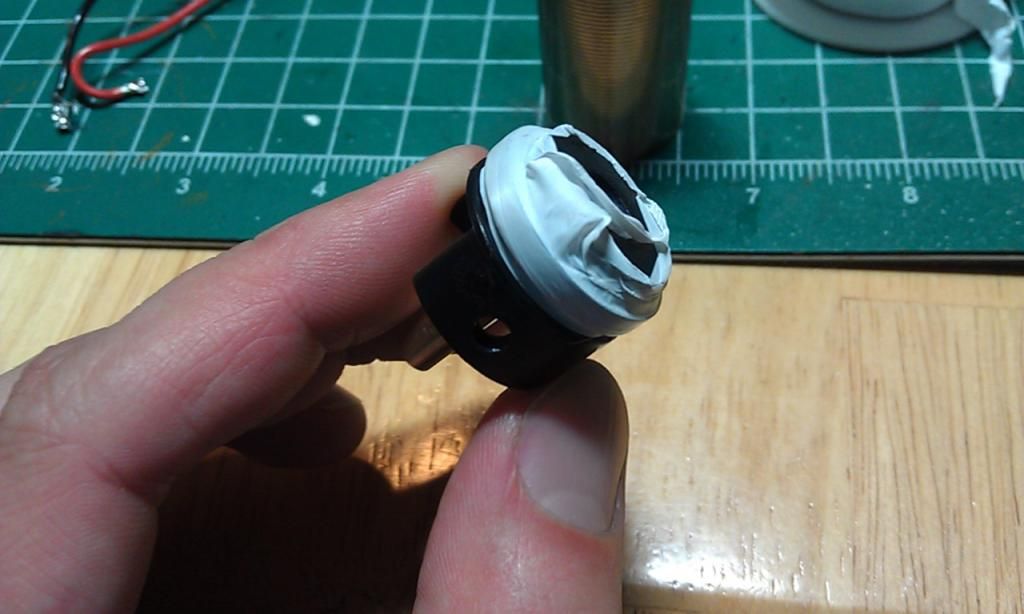
From there, take some teflon plumber's tape, also available from Home Depot for next to nothing, and wrap once or twice around the cylinder head. Take the o-ring off before and then place it back on OVER the teflon tape.
http://i16.photobucket.com/albums/b46/s ... Head-5.jpg
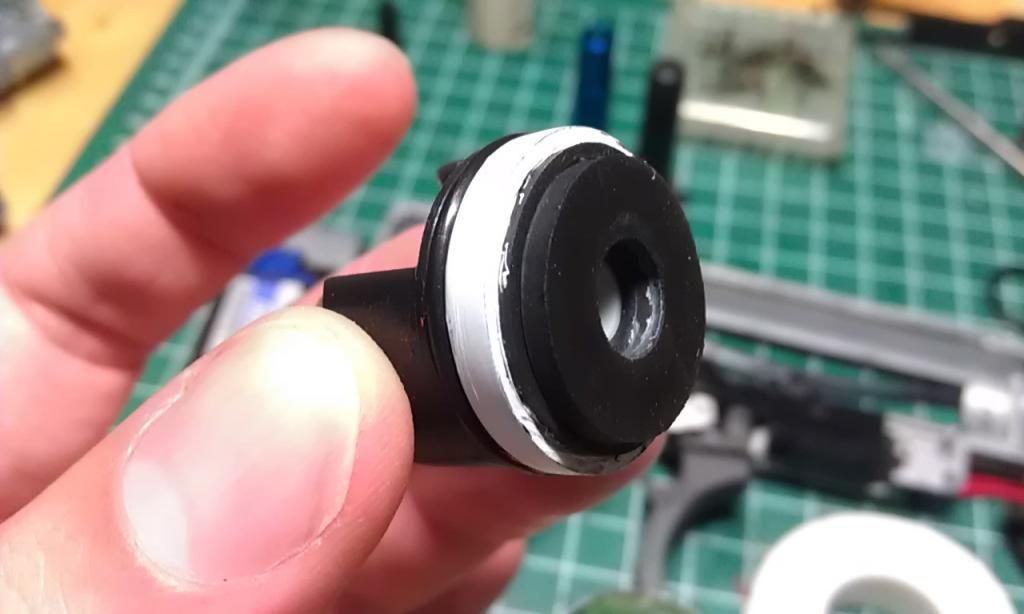
Then clean the excess off with an exacto blade.
http://i16.photobucket.com/albums/b46/s ... Head-6.jpg
These steps should yield near perfect compression.
With the compression bits sorted, I went on to shim the gearbox. I snapped in the Hurricane steel bushings and they all fit well, From the outside of the gearbox shell, I put a drop of superglue on the outer rim of the bushings in order to fix them to the gearbox. I slightly overshimmed the gears, put them in the bushings, and screwed the gearbox together to force the bushings to seat as flat as possible.
After a few minutes the glue was dry and I had secure, flat bushings.
http://i16.photobucket.com/albums/b46/s ... shings.jpg
I went on to properly shim the gearbox (there are plenty of guides on this). I decided to use the stock TM gears as they were in fairly decent shape and I was being cheap. After shimming them to what I thought was perfect, I closed the gearbox and realized I had a problem as they would not spin freely. Testing a bevel and spur gear from a JG gear set I had laying around confirmed the problem; the axle shafts of the TM gears are approximate 2.97mm (measured with a micrometer) compared to the JG gears at 2.94mm. To give you an idea of how important tolerances can be, .03mm made the different between free spinning gears and not with the slightly out-of-spec Hurricane bushings.
Putting the project aside for a while, I ordered a set of ZCI 16:1 gears ($17) from Clandestine Airsoft along with the aforementioned nozzle, and I decided to try 3/16" sorbothane pads while I was at it to correct the AOE instead of the rubber washer.
Sorbothane is cool stuff. Its primary function is to absorb the shock of the piston slamming into the cylinder head and gearbox shell. Its secondary function is to push the piston back to correct AOE.
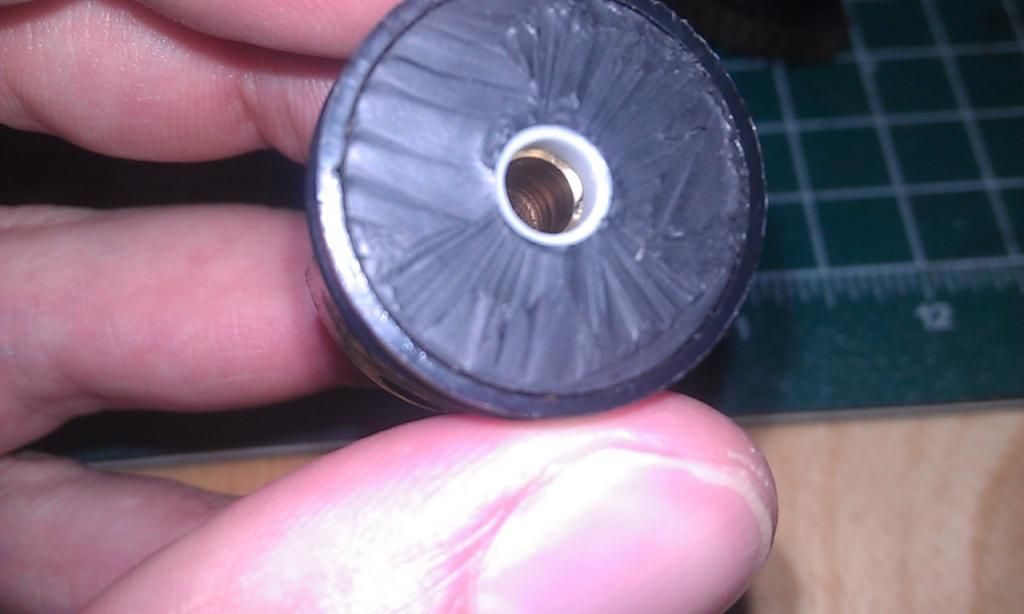
First, I tried to rip the rubber washer off of the rubber pad of the cylinder head, which basically destroyed it. Using a very sharp knife I cut the rubber pad flush with the cylinder head, which looked like this:
http://i16.photobucket.com/albums/b46/s ... orbo-1.jpg
Again, I cleaned that and the sorbothane pad with alcohol and superglued them together. Since sorbothane is squishy and relatively easy to tear, I also ordered the thin neoprene pads that are glued on top to protect the sorbothane. The finished assembly looks like this:
http://i16.photobucket.com/albums/b46/s ... orbo-2.jpg
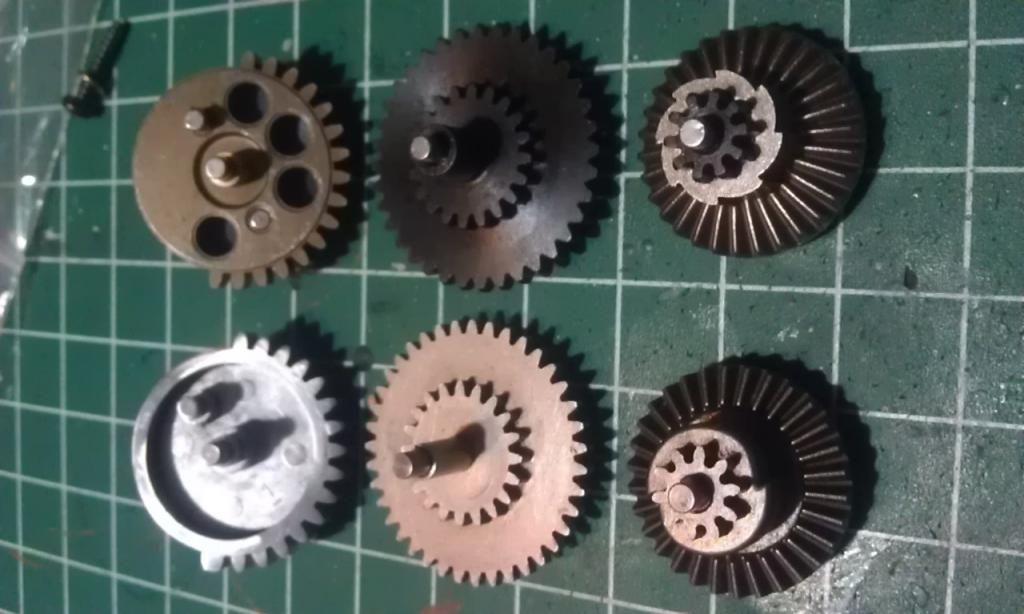
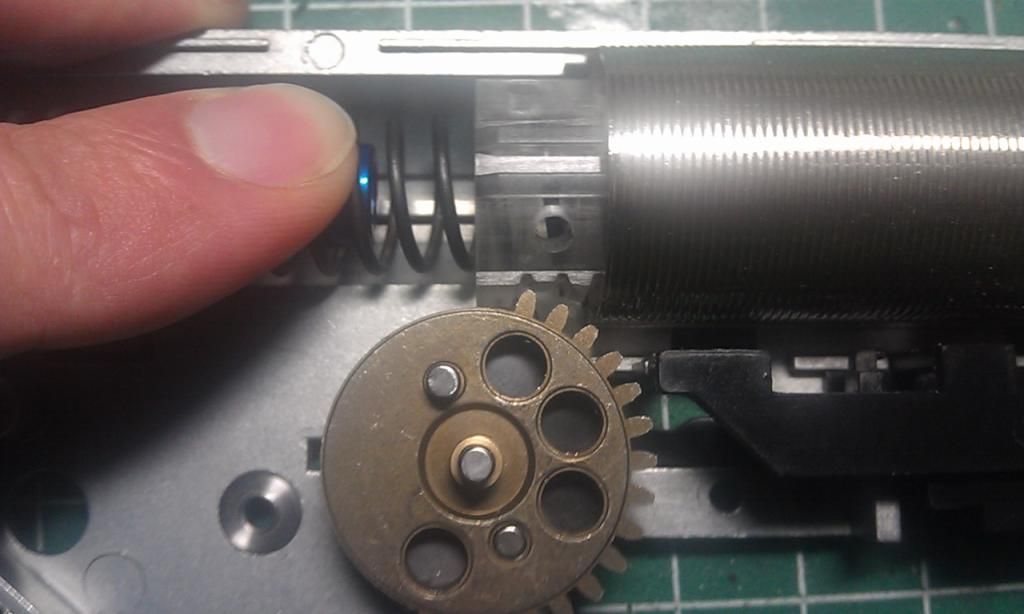
Going back to the gears and shimming, I measured the axles of the ZCI gears and they came out to the same 2.94mm as the JGs. A comparison of the stock TM gearset to the ZCI set: Note that the outer ring of the ZCI spur gear has 36 teeth compared to 39 teeth of the TM, giving the lower 16:1 ratio which translates to a 12% increase in rate of fire, all else being equal.
http://i16.photobucket.com/albums/b46/s ... arison.jpg
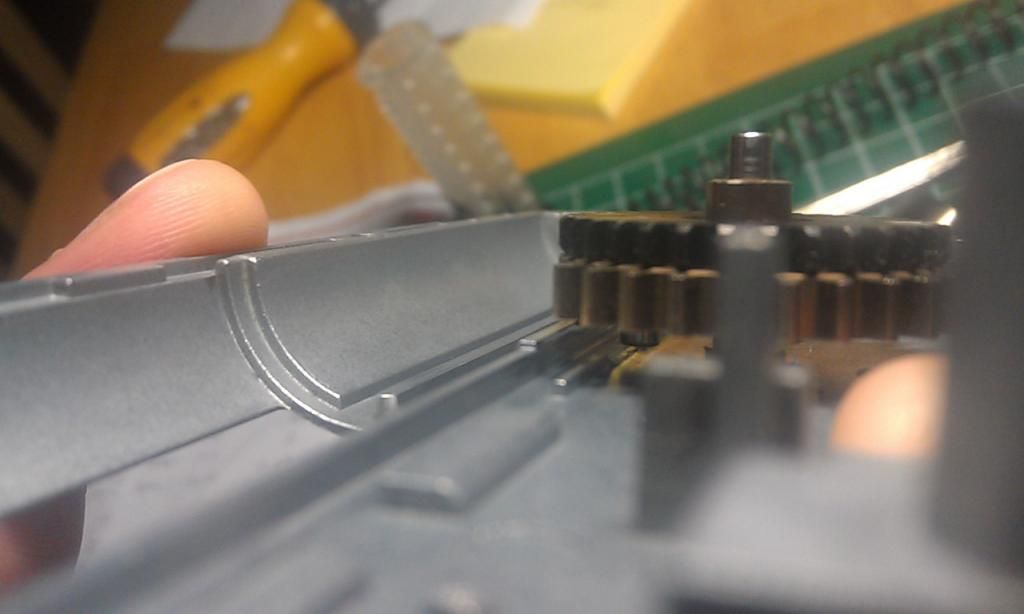
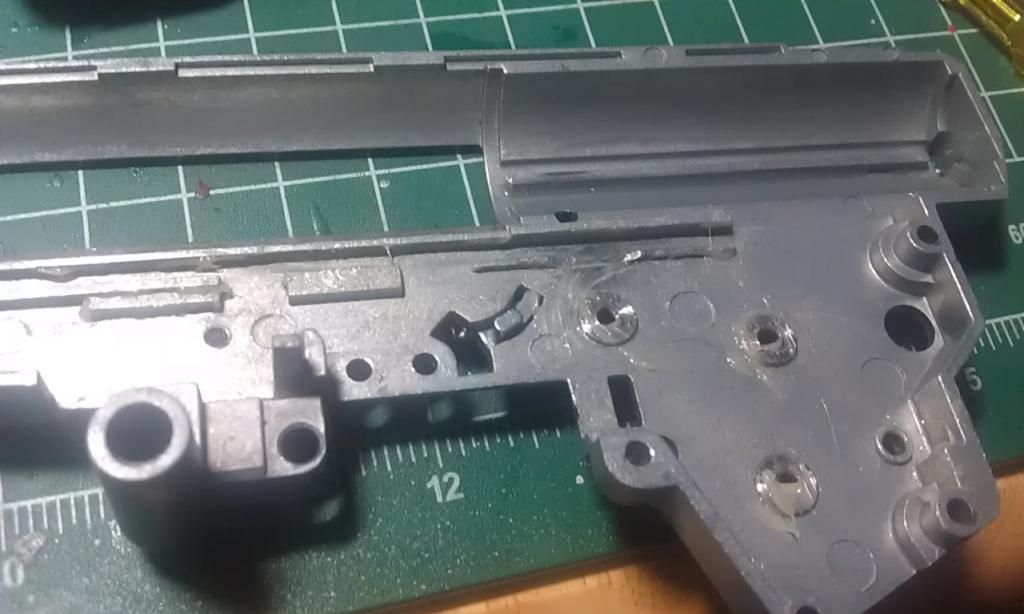
For $17, the quality is fairly good, although they are not perfectly true to TM spec as the tappet cam pin protrudes slightly farther and can rub against the tappet guide depending on shimming. And since the zinc-alloy of the gearbox shell is softer than the hardened steel gear axle. I decided to shave the shell down with a dremel tool like this:
http://i16.photobucket.com/albums/b46/s ... leared.jpg
Another angle showing the clearance:
http://i16.photobucket.com/albums/b46/s ... ceTest.jpg
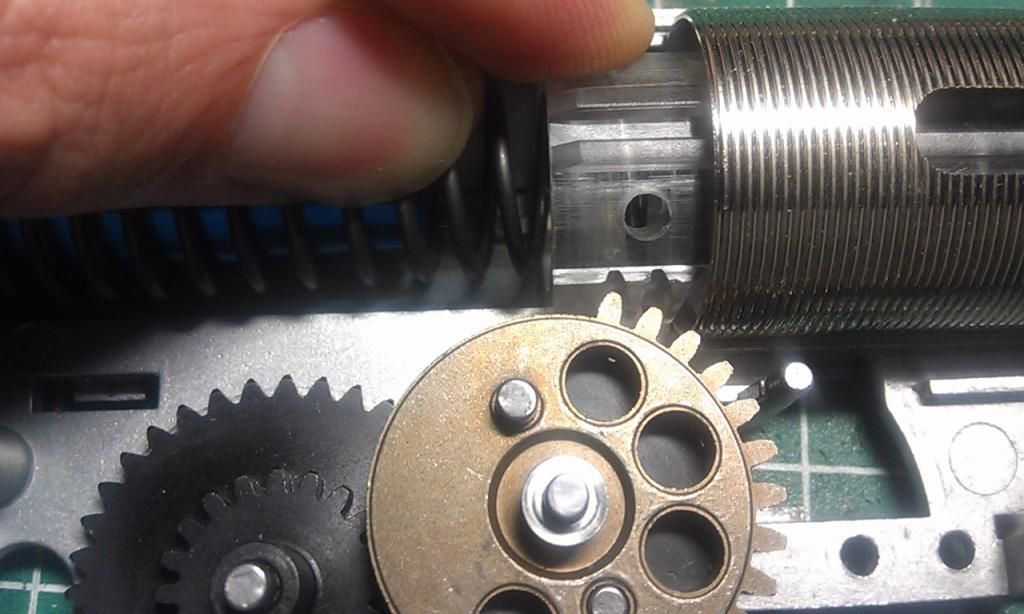
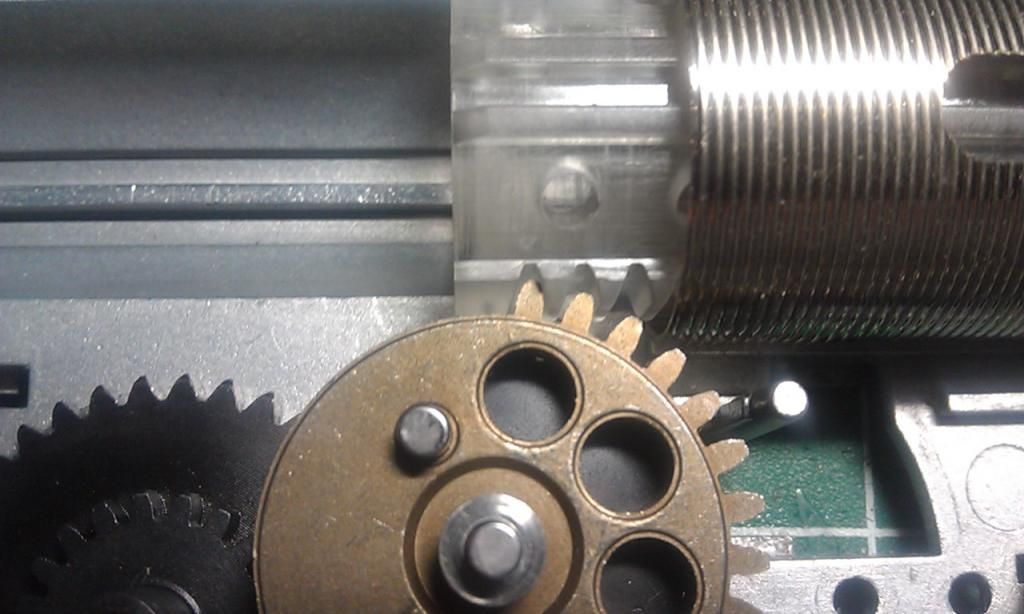
With the gears shimmed and with proper clearance, I turned to correcting AOE. Angle of engagement is how the first tooth of the sector gear makes contact with the first tooth of the piston. Ideally, the more surface area of each that touches the more it reduces strain on the teeth. Additionally, and more importantly, the angle at which the teeth are forcing into each other should be as close to straight backwards as possible. With most stock setups, the sector gear makes partial contact with the piston tooth at an angle that forces the piston back, but also slightly up.
http://i16.photobucket.com/albums/b46/s ... Before.jpg
The idea is to move the piston's rest position back, so the sector gear contacts it later and straighter. Like this:
http://i16.photobucket.com/albums/b46/s ... Eafter.jpg
This drastically reduces the strain on both the sector gear and the piston rack, making it more durable and able to take more extreme springs or rates of fire. Either the extra rubber pad or extra sorbothane will accomplish the goal of setting the piston's rest position farther back, with the sorbothane having they added benefit of absorbing more shock.
However, correcting the AOE causes a few problems. The first, is that the lower total cylinder volume and smaller distance the piston has to accelerate decreases the total FPS. Figure a 10-15 fps drop for this. The obvious solution is to a higher rated spring.
The other problem is that the piston rack needs to be cut down so the sector gear still engages the fat pickup tooth on the back of the piston rather than the second or third tooth in. Look at this picture again and you can see how the second and third tooth will interfere:
http://i16.photobucket.com/albums/b46/s ... Eafter.jpg
The solution to this is to remove the second tooth and part of the third tooth depending on what is in the way. My piston ended up looking like this:
http://i16.photobucket.com/albums/b46/s ... AOEcut.jpg
And how it looks on the final test fitting with the spring in:
http://i16.photobucket.com/albums/b46/s ... Efinal.jpg
Note that because this spring is compressing the sorbothane with its full force, the piston rest slightly farther forward than ideal. In hindsight, 1/4" pads would have been the better choice than 3/16". But while not ideal, this was acceptable to me.
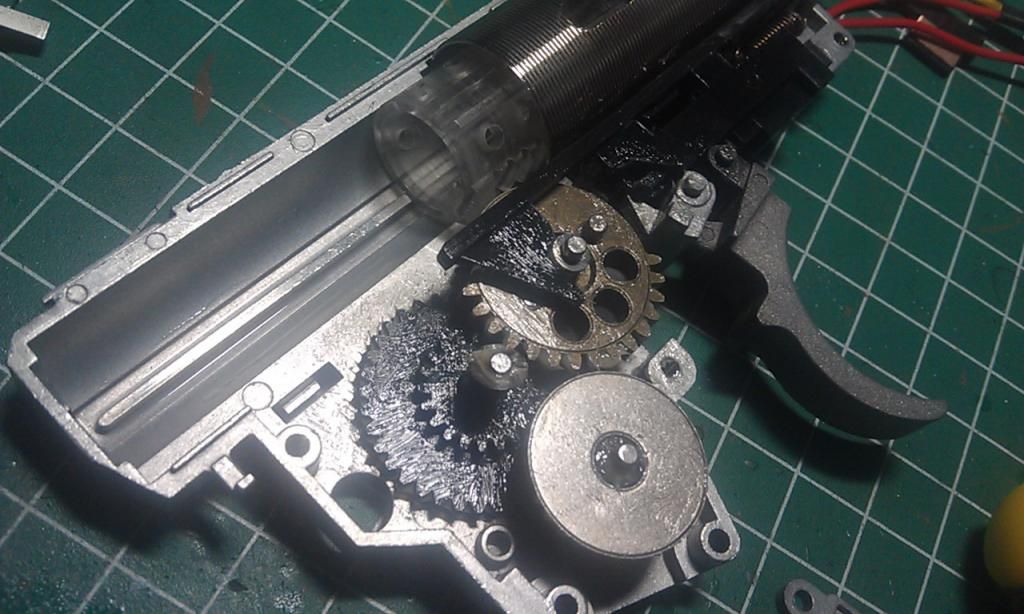
After a final test fit I began greasing everything up for final assembly. I use white lithium grease for the gears, anti-reversal latch, and piston rack. I use 40 weight silicone RC shock oil for all compression parts and piston rails. I apply the lithium grease to the gears with a small paintbrush and the silicone oil with my finger.
http://i16.photobucket.com/albums/b46/s ... ease-1.jpg
http://i16.photobucket.com/albums/b46/s ... ease-2.jpg
After a final check to make sure I had no left over parts, I put it together.
TESTING
While the wiring and mosfet assembly was unacceptable, I was still able to test fire the G36C with the front hand guard off. I used a AMP chronograph for FPS, and audio analysis for rate of fire. I tested it with .20 bbs.
With the fully charged 2650mah 25-50C 11.1 lipo. The G36C ranged between 356-361 FPS (with hop-up fully off) and at a very steady 27 rounds per second.
BUILD SHEET
Gearbox: Stock TM
Bushings: 6mm Hurricane
Gearset: ZCI 16:1
Spring: PDI 150%
Motor: TM EG1000
Cylinder: Hurricane
Cylinder Head: Stock TM, polished
Piston: Angel Polycarbonate, lightened
Piston Head: Hurricane POM, bearings removed
Nozzle: Lonex
Tappet Plate: Stock TM
Spring Guide: Hurricane w/Bearing
ARL: Stock TM
THOUGHTS SO FAR
While the FPS rating is exactly where I wanted it considering FPS from hop-up tuning, the 27 rounds per second is lower than what should be achievable with this build. My best guess is that the aging stock EG1000 motor is in poor shape, making it slower than it should be. Even if this is true, a neo-magnet motor should be used when doing a proper high speed build and will consider one in the future. But for now, and in the sake of cost-effectiveness, I decided to use the original motor.
That being said, 27 rps is no slouch and should do well in the field.
Next update will be after I sort out the wiring issues and finally get it completely put together.
One tenet of a high speed build is to make the piston assembly lighter to avoid pre-engagement. That's when the sector gear is rotating faster than the piston return time, essentially catching it somewhere in the middle of the piston and forcing it back, and since you can't compress polycarbonate without bad things happening, bad things happen.
Basic physics tells us force=mass x acceleration (F=ma). The force is supplied by the spring and is virtually constant. But by reducing mass you can increase acceleration. Think about a Honda Civic vs. a Sport bike, both have about the same horsepower, but the bike weighs much less and therefore accelerates faster.
So I went about lightening the piston assembly to increase its return speed. The piston is an Angel polycarbonate with two metal teeth. It is lighter than the stock TM piston and was a good place to start from. I began drilling pilot divots with a pin vice. This minimizes the drill bit from wandering when I went to actually drill out the holes.
http://i16.photobucket.com/albums/b46/s ... ight-1.jpg
From there, I drilled through, slowly as not to punch through to the other side of the piston. After cleaning up the inside of all the little bits of polycarbonate that didn't come complete out of the holes, it looked like this:
http://i16.photobucket.com/albums/b46/s ... ight-2.jpg
This is pretty safe, retaining much of its strength, and I could probably safely go with bigger holes. But as I was only shooting for mid-30s for rpm while maintaining higher fps, this is enough. You can go much more aggressive than this, but keep in mind a lighter piston will be a weaker one.
I picked up a Hurricane Sig 552 upgrade kit from Airsoft Atlanta for $22, a smoking deal considering that it came with an M120 spring, steel bushings, bearing spring guide, POM bearing piston head, cylinder, cylinder head, and nozzle. Although the cylinder head and nozzle would not work for the G36, the rest of the parts were compatible with the TM version 3 gearbox. Overall, I would say the Hurricane parts are of acceptable quality while not great. The cylinder head being machined very poorly is an exception.
I removed the piston head bearings, again in the interest of saving weight and slightly reducing the output of the PDI 150% spring I was planning on using. With the bearings on the spring guide, they are redundant on the head.
http://i16.photobucket.com/albums/b46/s ... ight-3.jpg
The Hurricane design has an aluminum nut that runs through the entire head, while not the lightest piston head available, this looks very strong and with my build, acceptable.
http://i16.photobucket.com/albums/b46/s ... ight-4.jpg
With the piston assembly done, I moved on to the compression parts. The original cylinder looked fairly good, although the interior was not as polished as the stock TM cylinder. I took an Exacto blade and edged the inside of the port and followed it with a fine grit nail file to remove an small burs that might have been left by the manufacturing process and would damage the o-ring over time. You can barely see the shiny copper colored edge around the inside of the port.
http://i16.photobucket.com/albums/b46/s ... rDebur.jpg
Together, the original cylinder head and nozzle were fairly worn and had poor compression. This can be tested by holding the nozzle halfway on the cylinder head shaft (::tee hee::, but seriously, this is about where the nozzle is when the piston slams the air out of the cylinder) cover the back of the cylinder head with your figure and blow on the nozzle as hard as you can. If your face gets all red, you have good compression, but if you can slowly force air out, then your compression is poor.
The stock TM nozzle does not have an o-ring and years of use had worn it down. I would later order a Lonex nozzle from Clandestine Airsoft, also a good deal at $6, and has an o-ring, and would restore the compression between the two parts.
Since the stock cylinder head was fine aside from the shaft being scratched, I decided to polish it and call it good. Any metal polish, like Brasso, will work fine.
Before:
http://i16.photobucket.com/albums/b46/s ... Head-3.jpg
And After:
http://i16.photobucket.com/albums/b46/s ... Head-4.jpg
Next on the cylinder head was to add an extra rubber washer, available at Home Depot or whatever very cheaply, in order to correct the AOE, or angle of engagement. I'll discuss AOE later.
Clean the rubber pad on the cylinder head and the rubber washer with alcohol (head-1) and then superglue them together (head-2). A little is enough and this will hold very, very well, as I would later find out.
http://i16.photobucket.com/albums/b46/s ... Head-1.jpg
http://i16.photobucket.com/albums/b46/s ... Head-2.jpg
From there, take some teflon plumber's tape, also available from Home Depot for next to nothing, and wrap once or twice around the cylinder head. Take the o-ring off before and then place it back on OVER the teflon tape.
http://i16.photobucket.com/albums/b46/s ... Head-5.jpg
Then clean the excess off with an exacto blade.
http://i16.photobucket.com/albums/b46/s ... Head-6.jpg
These steps should yield near perfect compression.
With the compression bits sorted, I went on to shim the gearbox. I snapped in the Hurricane steel bushings and they all fit well, From the outside of the gearbox shell, I put a drop of superglue on the outer rim of the bushings in order to fix them to the gearbox. I slightly overshimmed the gears, put them in the bushings, and screwed the gearbox together to force the bushings to seat as flat as possible.
After a few minutes the glue was dry and I had secure, flat bushings.
http://i16.photobucket.com/albums/b46/s ... shings.jpg
I went on to properly shim the gearbox (there are plenty of guides on this). I decided to use the stock TM gears as they were in fairly decent shape and I was being cheap. After shimming them to what I thought was perfect, I closed the gearbox and realized I had a problem as they would not spin freely. Testing a bevel and spur gear from a JG gear set I had laying around confirmed the problem; the axle shafts of the TM gears are approximate 2.97mm (measured with a micrometer) compared to the JG gears at 2.94mm. To give you an idea of how important tolerances can be, .03mm made the different between free spinning gears and not with the slightly out-of-spec Hurricane bushings.
Putting the project aside for a while, I ordered a set of ZCI 16:1 gears ($17) from Clandestine Airsoft along with the aforementioned nozzle, and I decided to try 3/16" sorbothane pads while I was at it to correct the AOE instead of the rubber washer.
Sorbothane is cool stuff. Its primary function is to absorb the shock of the piston slamming into the cylinder head and gearbox shell. Its secondary function is to push the piston back to correct AOE.
First, I tried to rip the rubber washer off of the rubber pad of the cylinder head, which basically destroyed it. Using a very sharp knife I cut the rubber pad flush with the cylinder head, which looked like this:
http://i16.photobucket.com/albums/b46/s ... orbo-1.jpg
Again, I cleaned that and the sorbothane pad with alcohol and superglued them together. Since sorbothane is squishy and relatively easy to tear, I also ordered the thin neoprene pads that are glued on top to protect the sorbothane. The finished assembly looks like this:
http://i16.photobucket.com/albums/b46/s ... orbo-2.jpg
Going back to the gears and shimming, I measured the axles of the ZCI gears and they came out to the same 2.94mm as the JGs. A comparison of the stock TM gearset to the ZCI set: Note that the outer ring of the ZCI spur gear has 36 teeth compared to 39 teeth of the TM, giving the lower 16:1 ratio which translates to a 12% increase in rate of fire, all else being equal.
http://i16.photobucket.com/albums/b46/s ... arison.jpg
For $17, the quality is fairly good, although they are not perfectly true to TM spec as the tappet cam pin protrudes slightly farther and can rub against the tappet guide depending on shimming. And since the zinc-alloy of the gearbox shell is softer than the hardened steel gear axle. I decided to shave the shell down with a dremel tool like this:
http://i16.photobucket.com/albums/b46/s ... leared.jpg
Another angle showing the clearance:
http://i16.photobucket.com/albums/b46/s ... ceTest.jpg
With the gears shimmed and with proper clearance, I turned to correcting AOE. Angle of engagement is how the first tooth of the sector gear makes contact with the first tooth of the piston. Ideally, the more surface area of each that touches the more it reduces strain on the teeth. Additionally, and more importantly, the angle at which the teeth are forcing into each other should be as close to straight backwards as possible. With most stock setups, the sector gear makes partial contact with the piston tooth at an angle that forces the piston back, but also slightly up.
http://i16.photobucket.com/albums/b46/s ... Before.jpg
The idea is to move the piston's rest position back, so the sector gear contacts it later and straighter. Like this:
http://i16.photobucket.com/albums/b46/s ... Eafter.jpg
This drastically reduces the strain on both the sector gear and the piston rack, making it more durable and able to take more extreme springs or rates of fire. Either the extra rubber pad or extra sorbothane will accomplish the goal of setting the piston's rest position farther back, with the sorbothane having they added benefit of absorbing more shock.
However, correcting the AOE causes a few problems. The first, is that the lower total cylinder volume and smaller distance the piston has to accelerate decreases the total FPS. Figure a 10-15 fps drop for this. The obvious solution is to a higher rated spring.
The other problem is that the piston rack needs to be cut down so the sector gear still engages the fat pickup tooth on the back of the piston rather than the second or third tooth in. Look at this picture again and you can see how the second and third tooth will interfere:
http://i16.photobucket.com/albums/b46/s ... Eafter.jpg
The solution to this is to remove the second tooth and part of the third tooth depending on what is in the way. My piston ended up looking like this:
http://i16.photobucket.com/albums/b46/s ... AOEcut.jpg
And how it looks on the final test fitting with the spring in:
http://i16.photobucket.com/albums/b46/s ... Efinal.jpg
Note that because this spring is compressing the sorbothane with its full force, the piston rest slightly farther forward than ideal. In hindsight, 1/4" pads would have been the better choice than 3/16". But while not ideal, this was acceptable to me.
After a final test fit I began greasing everything up for final assembly. I use white lithium grease for the gears, anti-reversal latch, and piston rack. I use 40 weight silicone RC shock oil for all compression parts and piston rails. I apply the lithium grease to the gears with a small paintbrush and the silicone oil with my finger.
http://i16.photobucket.com/albums/b46/s ... ease-1.jpg
http://i16.photobucket.com/albums/b46/s ... ease-2.jpg
After a final check to make sure I had no left over parts, I put it together.
TESTING
While the wiring and mosfet assembly was unacceptable, I was still able to test fire the G36C with the front hand guard off. I used a AMP chronograph for FPS, and audio analysis for rate of fire. I tested it with .20 bbs.
With the fully charged 2650mah 25-50C 11.1 lipo. The G36C ranged between 356-361 FPS (with hop-up fully off) and at a very steady 27 rounds per second.
BUILD SHEET
Gearbox: Stock TM
Bushings: 6mm Hurricane
Gearset: ZCI 16:1
Spring: PDI 150%
Motor: TM EG1000
Cylinder: Hurricane
Cylinder Head: Stock TM, polished
Piston: Angel Polycarbonate, lightened
Piston Head: Hurricane POM, bearings removed
Nozzle: Lonex
Tappet Plate: Stock TM
Spring Guide: Hurricane w/Bearing
ARL: Stock TM
THOUGHTS SO FAR
While the FPS rating is exactly where I wanted it considering FPS from hop-up tuning, the 27 rounds per second is lower than what should be achievable with this build. My best guess is that the aging stock EG1000 motor is in poor shape, making it slower than it should be. Even if this is true, a neo-magnet motor should be used when doing a proper high speed build and will consider one in the future. But for now, and in the sake of cost-effectiveness, I decided to use the original motor.
That being said, 27 rps is no slouch and should do well in the field.
Next update will be after I sort out the wiring issues and finally get it completely put together.
-
Spartanacus - Grunt
- Team: N/A
- Posts: 95
- Age: 43
- Joined: Mon Nov 21, 2011 8:12 pm
- Location: Portland, OR
Re: TM G36C Resurrection Work Log (updated)
![]() by Spartanacus » Wed Nov 28, 2012 1:34 pm
by Spartanacus » Wed Nov 28, 2012 1:34 pm
Thought I'd update this with my wiring solution even though this is evidently too advanced for this crowd 
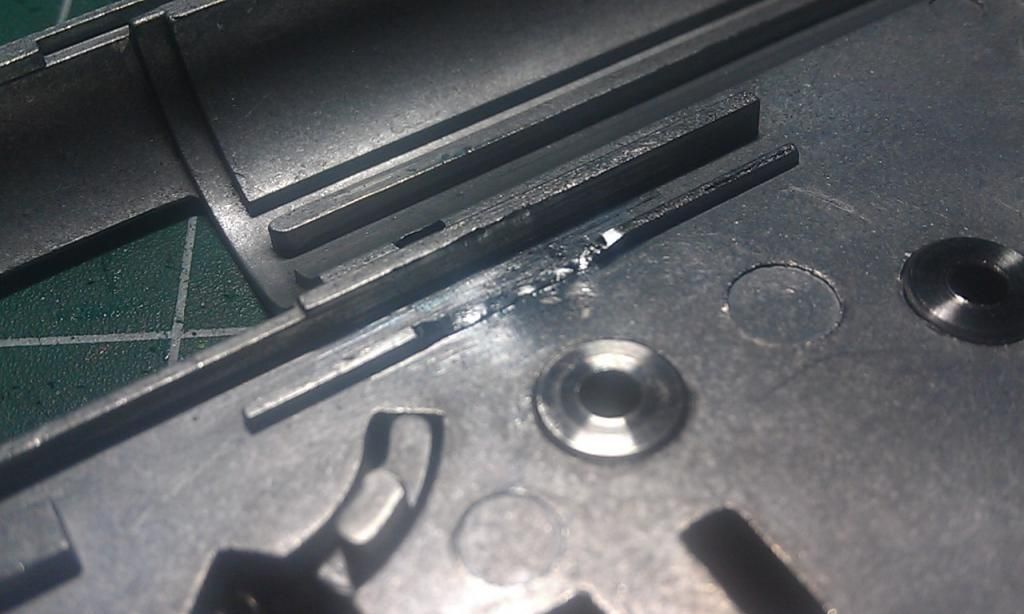
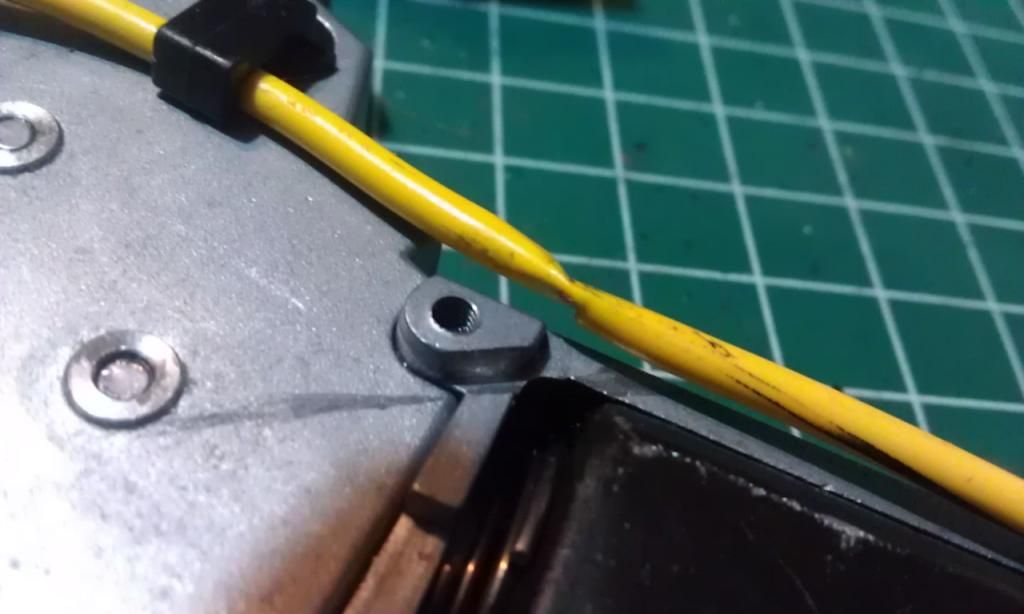
I decided to scrap the 12ga wiring altogether after I found that the wiring jacket had been completely torn by rubbing against the gearbox.
http://i16.photobucket.com/albums/b46/s ... Damage.jpg
Taking 16ga wire that I had laying around I swapped that out, guessing that this could restrict current and reduce my rate of fire. But anything was better than having a fire hazard in my hands.
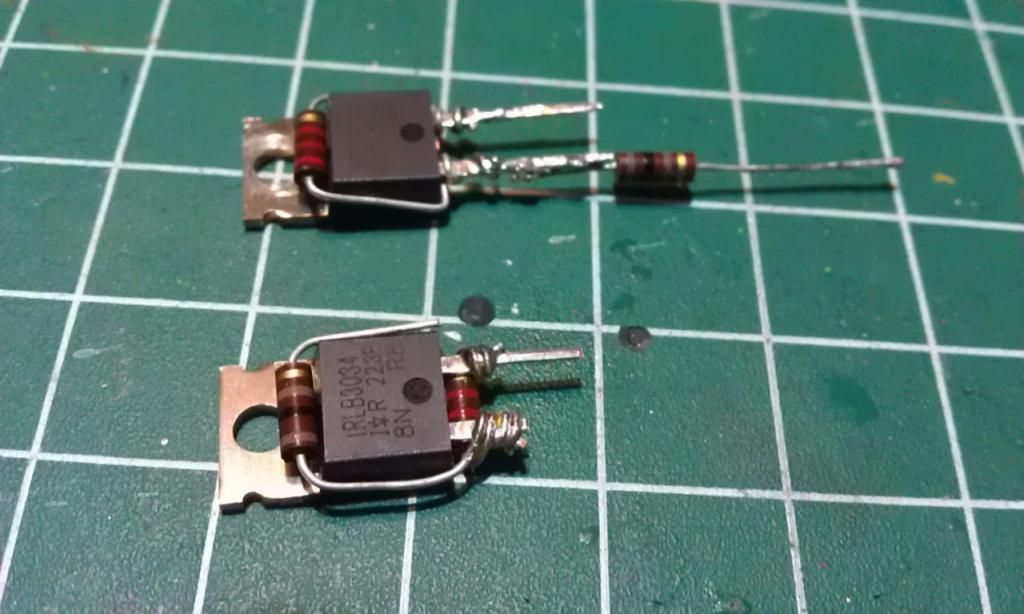
Knowing that I would redirect the wiring backwards after the fuse/mosfet assembly, I went about revising the mosfet design to make it as compact as possible and face the wires in the correct direction. This picture shows the before and after mosfets, old being on top and new design on bottom. Clearly it's an improvement in size, as well as durability.
http://i16.photobucket.com/albums/b46/s ... osfets.jpg
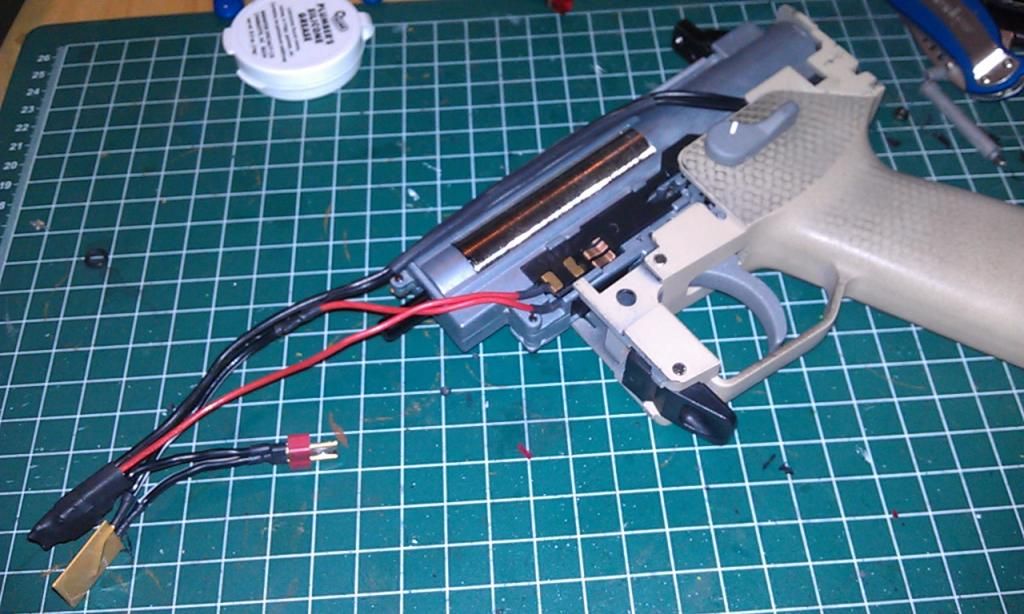
The rest was fairly easy. With the revising wiring:
http://i16.photobucket.com/albums/b46/s ... Wiring.jpg
And finally secured into the body:
http://i16.photobucket.com/albums/b46/s ... Wiring.jpg
A zip tie was used to both compact the package against the top as well as secure it so when the battery was installed, it wouldn't pull and damage the wiring. The downside to this is that I need to cut the zip tie every time I need to access the gearbox or hop up. A fair trade off for reliability, I guess.
By sliding the hand guard about two inches from the body, I can now easily coil up the battery wire and connect it to the fuse/mosfet unit. It slides on perfectly after that.
Wondering how much ROF I lost by downgrading the wiring I ran it through the audio analysis only to find that it fires 28 rounds per second. Clearly, 12ga was overkill as there was no loss in rate of fire, and the single RPS increase could be a testing error rather than an actual improvement over the larger wire.
Mission accomplished.
All told, excluding the optional bits like paint, the final tally breaks down like this:
$80 for the original G36C
$22 Hurricane upgrade kit
$6 Lonex nozzle
$5 Sorbothane
$17 ZCI 16:1 gears
$15 Lipo battery
$6 Mosfet/fuse components
$151 for a 360fps/28rps BB hose.
I decided to scrap the 12ga wiring altogether after I found that the wiring jacket had been completely torn by rubbing against the gearbox.
http://i16.photobucket.com/albums/b46/s ... Damage.jpg
Taking 16ga wire that I had laying around I swapped that out, guessing that this could restrict current and reduce my rate of fire. But anything was better than having a fire hazard in my hands.
Knowing that I would redirect the wiring backwards after the fuse/mosfet assembly, I went about revising the mosfet design to make it as compact as possible and face the wires in the correct direction. This picture shows the before and after mosfets, old being on top and new design on bottom. Clearly it's an improvement in size, as well as durability.
http://i16.photobucket.com/albums/b46/s ... osfets.jpg
The rest was fairly easy. With the revising wiring:
http://i16.photobucket.com/albums/b46/s ... Wiring.jpg
And finally secured into the body:
http://i16.photobucket.com/albums/b46/s ... Wiring.jpg
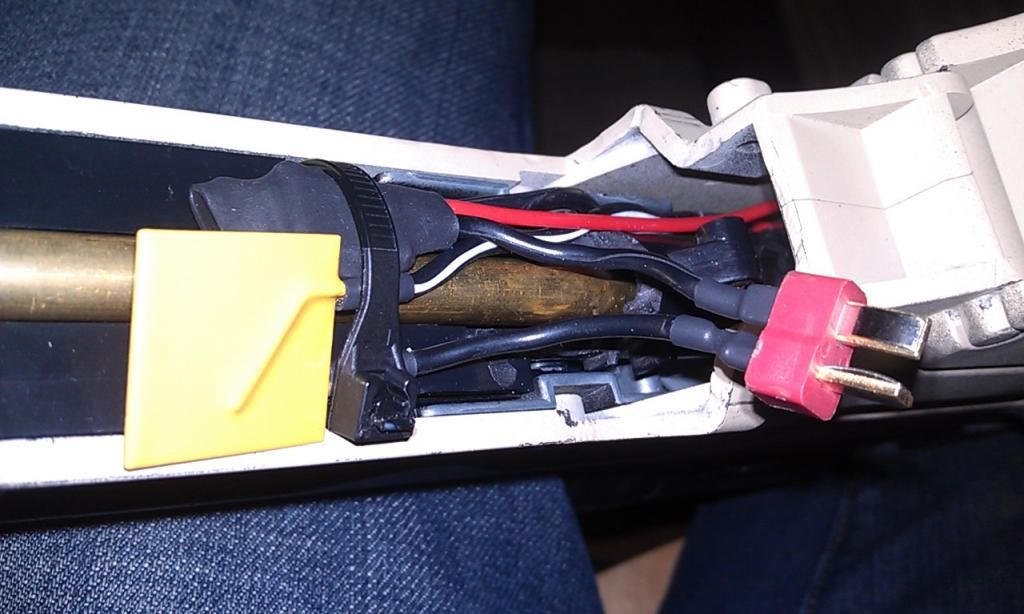
A zip tie was used to both compact the package against the top as well as secure it so when the battery was installed, it wouldn't pull and damage the wiring. The downside to this is that I need to cut the zip tie every time I need to access the gearbox or hop up. A fair trade off for reliability, I guess.
By sliding the hand guard about two inches from the body, I can now easily coil up the battery wire and connect it to the fuse/mosfet unit. It slides on perfectly after that.
Wondering how much ROF I lost by downgrading the wiring I ran it through the audio analysis only to find that it fires 28 rounds per second. Clearly, 12ga was overkill as there was no loss in rate of fire, and the single RPS increase could be a testing error rather than an actual improvement over the larger wire.
Mission accomplished.
All told, excluding the optional bits like paint, the final tally breaks down like this:
$80 for the original G36C
$22 Hurricane upgrade kit
$6 Lonex nozzle
$5 Sorbothane
$17 ZCI 16:1 gears
$15 Lipo battery
$6 Mosfet/fuse components
$151 for a 360fps/28rps BB hose.
-
Spartanacus - Grunt
- Team: N/A
- Posts: 95
- Age: 43
- Joined: Mon Nov 21, 2011 8:12 pm
- Location: Portland, OR
3 posts
• Page 1 of 1
Who is online
Users browsing this forum: No registered users and 3 guests
Links to Stuff
Manage My Stuff
You gotta be logged in to manage your stuff, duh.
Follow AP
141,117,244 Views since 3/14/07 • Delete all board cookies • All times are UTC - 8 hours [ DST ] © 2012 Airsoft Pacific, all rights reserved. Acknowledgements