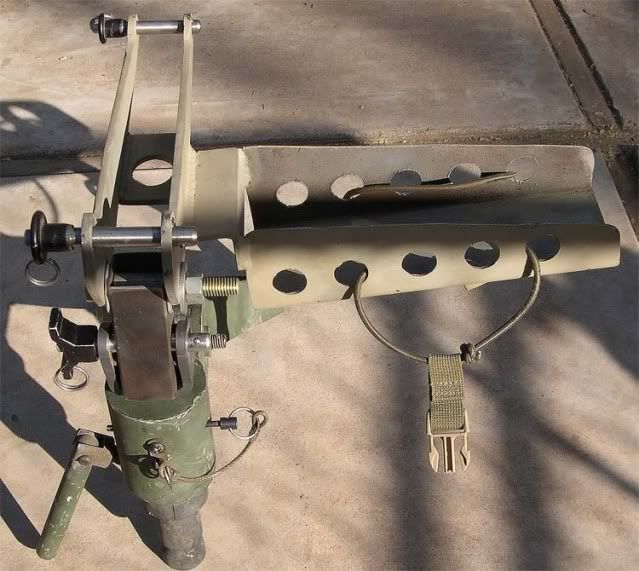
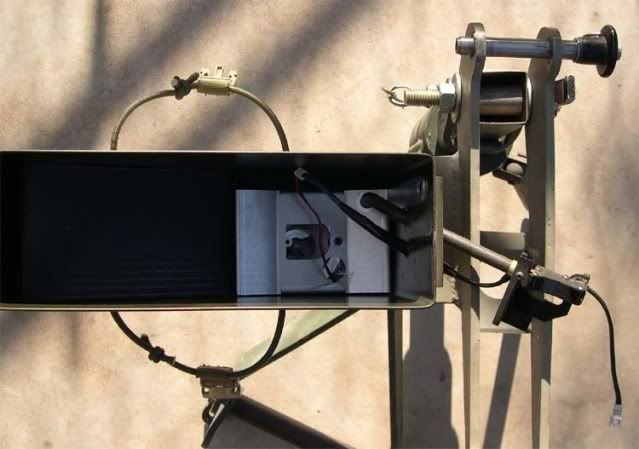
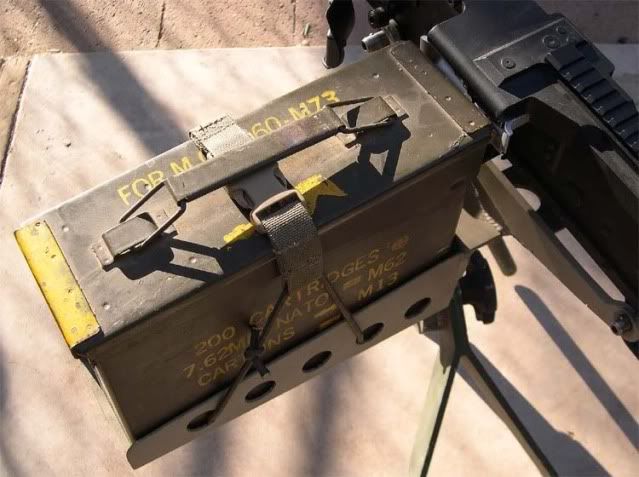
Updates are in Green Oct. 8th 2009, Blue Nov. 9th 2009, OD Jan. 1st 2010 & Orange May 25th 2010
Video instruction manual YouTube link has been added to bottom of this review
TRIGGER HAPPY M240 REVIEW
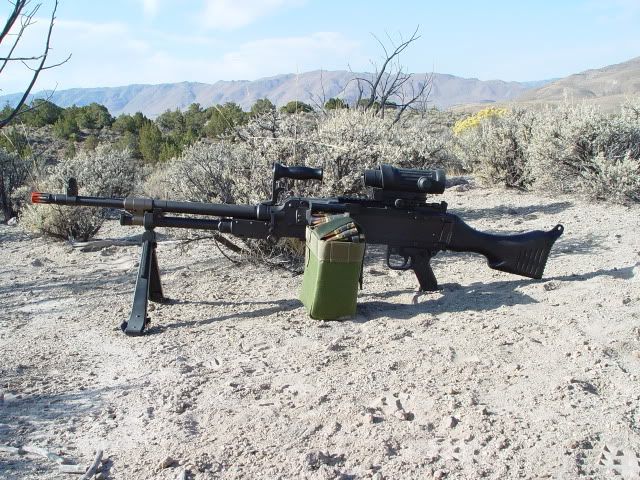
P.1 M240 is accessorized with a Trigger Happy Elcan scope and 7.62 dummy rounds
I’ve owned my Trigger Happy M240 now for almost a year. I ran into a few problems and tried to search the Internet for more information. However, I discovered there is not a whole lot out there. So I decided to write this review to help provide more hands on experience with this gun.
I purchased my TH M240 from Impact Games in Hawaii where the gun came directly from one of their suppliers in Hong Kong. Even though I’m in California, I chose Impact Games because they are one of the oldest airsoft shops in the U.S. and have one of the most experience airsoftsmiths I know. And since I was going to buy one of the most expensive airsoft guns currently available, I wanted it to be a solid reliable performer above all else.
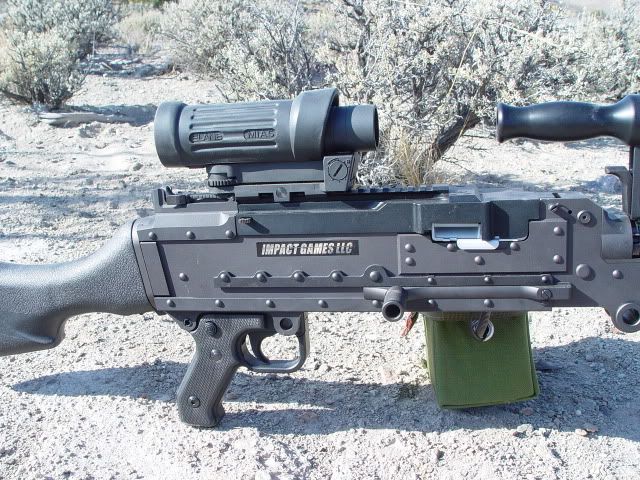
P.2
I did some extensive research on the TH M240 before buying my gun. I’ve heard mixed reviews. The most common comments I heard was that on the out side, the gun was beautiful and well built but the internals and its shooting performance were somewhat below par (mainly the barrel) considering its price tag. I had also considered the Inokatsu M240 but after seeing a video review of it shooting with an accuracy of a shotgun at only 30 ft, not to mention its higher price, I dismissed it. I think we can all agree that if you spend more than a $1,000 on an airsoft gun, its performance should at least be better than your average AEG.
With that in mind I asked Impact Games to strip the internals and replace it with the best parts in the market.
The parts that were replaced are as follows.
PDI 05 (6.05mm inner barrel) 595mm barrel
Guarder Hop Bucking
Systema Ver.3 Taper Cylinder Head
PDI Palsonite Cylinder
Guarder SP120 Spring
Guarder Ver.2 Steel Spring Guide with Bearings
Systema Torque-Up Gears
Tokyo Marui EG1000 Motor
Note: I replaced the Guarder SP 120 spring with a Systema M120. My original request was to have the gun shoot 395~400 fps with Excel bio-bb but it was frequently shooting slightly over 400 fps which was disqualifying my gun sometimes. With the Systema M-120 it now shoots an average 395 fps which is perfect.
Note: This gun was chronoed using Excel 0.20g Bio-BBs. The Bio-BBs are slightly smaller than the average BB. Because of this they tend to shoot about 15 fps lower in long barrel guns.
Note: It is not necessary to replace all the internal as I did. The biggest complaint I heard about this gun was the poor quality of the inner barrel. At minimum I would replace the inner barrel with a PDI or Prometheus inner barrel and the hop-up bucking with a Guarder hop-up bucking.
Another thing that I asked them to upgrade was the ammo feeder pouch. The ammo feeder that sits in the ammo pouch is made out of cardboard. I understand they did this to be more realistic. A 100 rounds belt of 7.62mm bullets sometimes comes in a cardboard box. So they were trying to achieve this look.
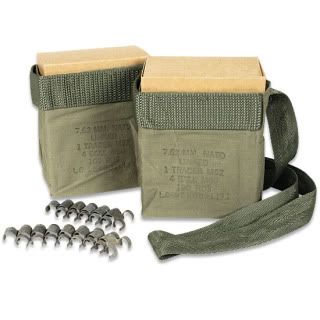
P.3 This M-60 repack Kit is available at http://www.cheaperthandirt.com
But in real life the box is used once then discarded. Cardboard wasn’t design for repeated use. So I had them replace the cardboard with plastic and duct tape to make it more durable. The results were quite nice, sturdy but flexible and with a pull up tab to boot.
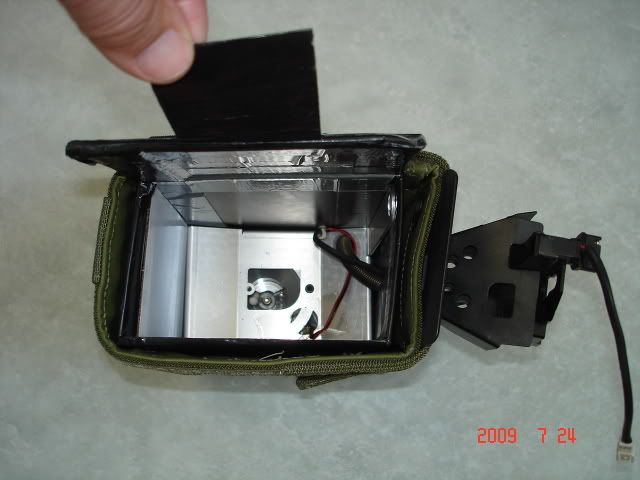
P.4 NOTE: On the very bottom of the feeder you will always see a white BB. This is an important anti-jamming feature and not a stuck BB. Don't try to remove it.
At the time I made this review I did not have pictures of my gear box. I hope to have them posted in the near future. However, after doing some research on the Internet, I found a YouTube link for upgrading a VFC (Vega Force Company) M-60 Mk-43 gun. The gear box in this video looks nearly identical to the one in the Trigger Happy M-240. The only difference was the color of the gear box (mine was silver) and the trigger switch, which sits below and behind the motor and not under the cylinder as shown in the video. http://video.google.com/videoplay?docid=-6981761473105456457#
When I got the gun and opened it up. Visually I was not disappointed. It looked very realistic and the parts looked like they were made with high quality machined parts and a nice gun metal finish.
The gun comes in 10 parts: barrel, bipod, receiver, ammo tray, top cover tray, ammo tray pin, trigger, trigger pin, stock and the ammo feeder pouch. Which assemble very much like a real M240. When I put all the parts together, the precision machining showed. All of the parts fit smoothly and snug like a pair of racing gloves.
However, there are 2 areas that require a little effort attaching.
One is the top tray. The front section of the top tray pushes up against a large spring button which is rather stiff making insertion of the tray pin a little difficult.
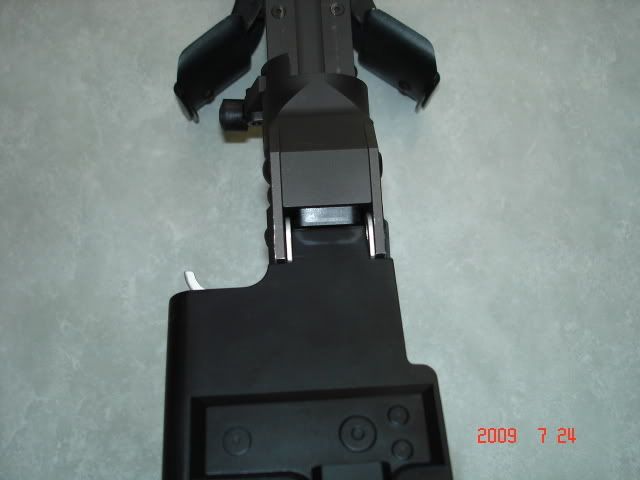
P.5
I found the best way to do this is to first drop in the silver ammo tray. Then insert the top tray at a 30' angle and firmly push the tray all the way forward, then close it. Once the top tray is closed, insert the pin that holds the ammo and top tray in.
The other is the stock. The wires in the back can sometimes stick out a little making it difficult to close at times. The best thing to do is make sure the wire and fuse box are tucked well into the body before sliding the stock close.
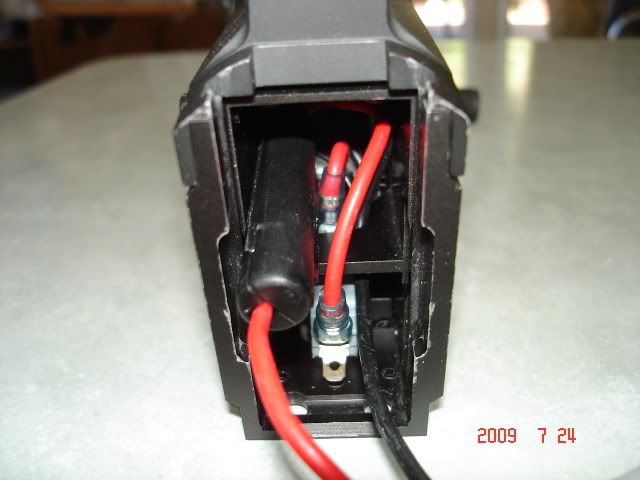
P.6
There were two other areas that required some modification.
The first one was the stock. A large 9.6v battery fits snugly in the stock. However, with SAWs, I like to use a lower voltage battery such as an 8.4 v because I prefer to shoot with long but slow firing burst than a high speed short burst. (A SAW is all about suppression!) So, when I tried to put an 8.4v battery in, I discovered it wouldn’t drop in. Since the last battery cell on an 8.4v is perpendicular to the other cells it actually makes the battery a little wider on that end. Not a whole lot but enough that it wouldn’t drop in. If I pushed hard a little bit I could get it in but trying to get it out was twice as hard. I was concerned about ripping the wires out of the battery. I guess trigger Happy just automatically thought that everyone would use a large 9.6v and didn’t bother trying other batteries. So, I took a half rounded file and grinded the top and bottom of the inside of the stock neck. Fortunately I didn’t have to shave too much to get the 8.4 v to fit.
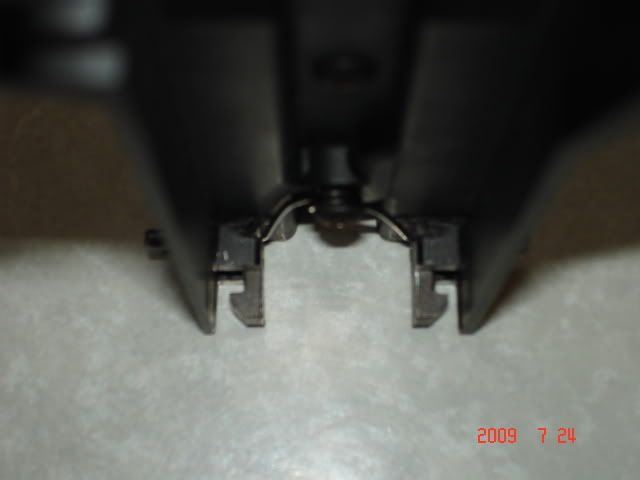
The other area that required minor modification and the only thing I considered to be a design flaw, was with the top tray cover. When I closed it, the top tray did not seem to be locking in. I could open it relatively easy by pulling on it without pushing in on the release buttons on the back of the tray . This was not right. Once the tray is locked in, it should sit securely on top of the receiver and not be easily pulled off. After a little examination, I discovered that the two little push buttons that you squeeze on the back of the top tray to open it are connected to 2 angle hooks underneath.
P.7
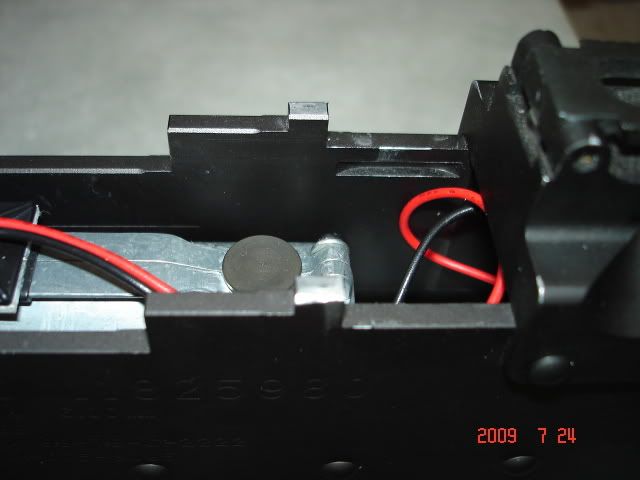
Theses angle hook are supposed to slip into a cut groove on the inside of the receiver and lock the tray down. (The groove is just above the red wire on the right).
P.8
The problem was the tray wasn’t sitting down low enough for the angle hooks to slip in to the locking grooves on the inside of the receiver. My first thought was to file the 2 nubs on top of the back section of the receiver where the tray sat on. But the tray was already sitting flush with the body. If I filed the 2 nubs, it would no longer sit flush with the body. Instead, I removed the rear locking angle irons (as shown in pic. 7) and filed the top portion down about 1 or 2mm. After I did this, it fixed the problem and now I can lift the gun up by the tray. However, I don’t recommend picking up your gun that way. Always use the handle.
As for performance, the THM240 shoots like a dream! Impact Game’s quality craftsmanship in upgrading this gun definitely shows. The range and accuracy is incredible. I basically can out gun just about anyone in the field. I have no trouble picking off targets at 50 yards. On top of that, the gearbox runs very smooth and quiet. That is a testament to an excellent shim job.
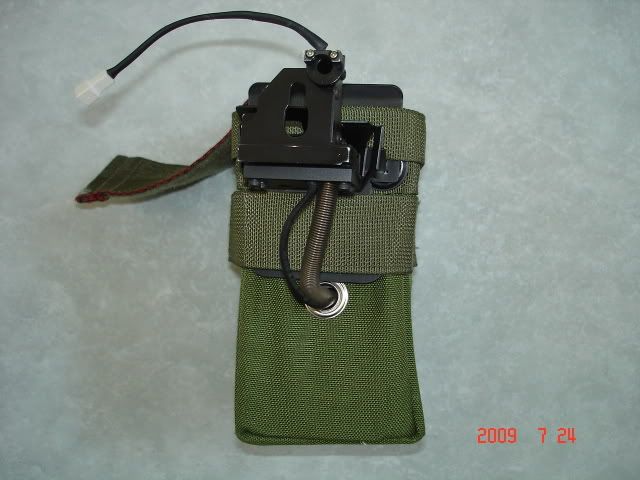
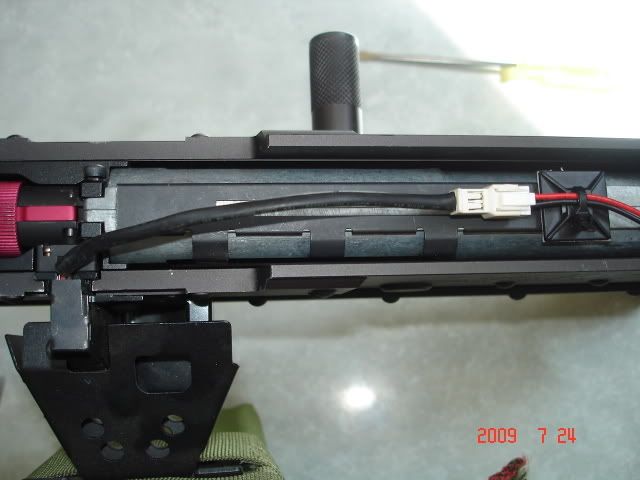
However the nicest aspect is the ammo box. It is one of the smoothest and quietest motorized ammo box/drum mags I have ever seen. In fact the first time I shot it. It was so quiet that I thought it wasn’t working. The other thing I like about it is that that there is only one small wire that you can barely see. This wire connects to another wire that shares the same connection as the trigger which connects to the battery in the stock. So there is no need to have a battery in the ammo box to power the feeder. And since they are connected together, the ammo box feeds BBs into the gun when ever you pull the trigger. Another excellent feature is the tube spring that feeds BBs from the ammo box to the gun is integrated into metal frame that clips on the side of the gun.
P.9
So attaching it is simple, easy and snug.
P.10
This is perhaps the most user friendly ammo box that I have ever seen. On top of all of this I never had a jam or feeding issue. And last, you can have someone pour BBs into you ammo box while you are shooting. Its only drawback is when you first put BBs into the ammo box. It takes about 5 to 7 seconds of shooting for the first BB to travel up the spring tube and into the chamber. If there was one change I could make, I would have the spring tube run up inside the ammo box and out just below the top and through the support frame for a cleaner look. That said, Trigger Happy deserves a round of applause for this ammo box design.
After doing some research, I discovered that VFC actually makes the ammo box for Trigger Happy but Trigger Happy makes the support frame that attaches the ammo box to the gun. (So it is identical to the M60 Mk-43 ammo box. However the ammo box for the Mk-43 does not have the support frame and the BB spring tube that connects to the gun is different.)
FIELD PERFORMANCE
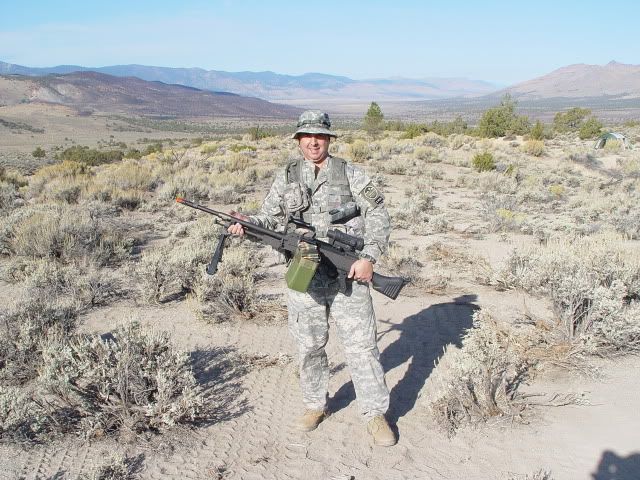
Now for the field performance review. I’ve used this TH M240 in various terrain and weather from heavy winter snow fall in the Sierra Mountains to the heat of the of the Nevada desert. I've also humped it miles by hand and mounted on vehicles. The TH M240 performed admirably in all conditions.
P.11Reno Desert

P.12 Ambush In The Snow
At 16 pounds this gun is about 10lb lighter than the real one but still about twice as heavy compared to your average airsoft gun. Combine with its size of 49 inches which is just over 4 feet. This is a beast of a gun to be lugging around. When firing, the best position to be in is on the ground using your bipod. Shoulder firing is difficult for any long period of time and the ammo pouch hanging off to the left makes the gun unbalanced. On occasions I found myself borrowing a friend’s shoulder while he holds on to the bipod. This works pretty well. In most cases though, I found myself shooting from the hip. So getting a SAW sling is highly recommended.
When you do uses a sling, one thing I recommend is that you don’t attach it to your barrel. This can potentially put stress on the barrel and cause damage over a period of time. The best place to attach it is at the front end of the gas tube. The gas tube is the cylinder underneath the barrel and is attached to the receiver. At the end of the gas tube and just behind where the bipod attaches, you will see a “Uâ€


